


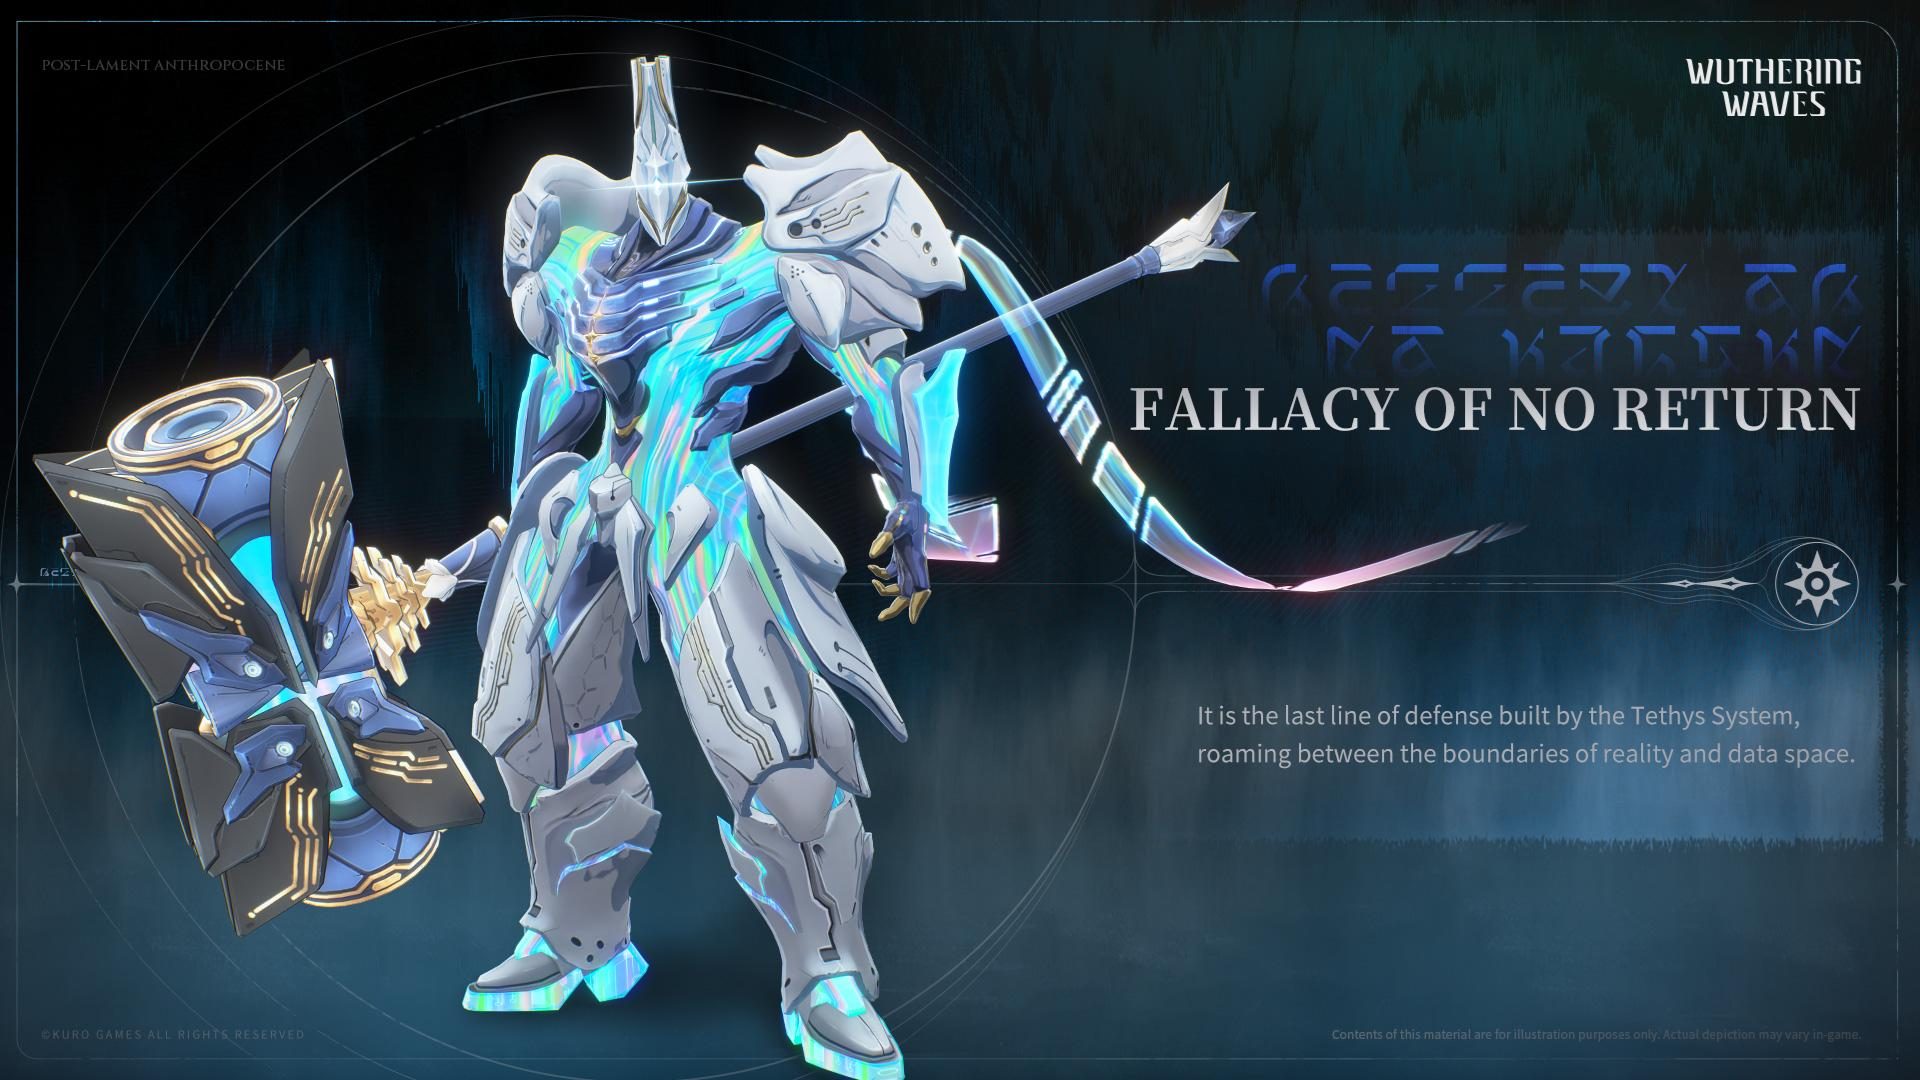
Mastering the “Fallacy of No Return” in Wuthering Waves: A Comprehensive Boss Breakdown

Confronting the “Fallacy of No Return” in Wuthering Waves can feel overwhelming—but with the right tactics, team setup, and timing, you can turn this grueling fight into a decisive victory. This guide will walk you through locating the boss variants, understanding its mechanics, perfecting your combat approach, and more.
Table of Contents
📍 Where to Find the Fallacy of No Return
1. Standard Boss Version (Tethys’ Deep)
-
Location: Data Torrent within Tethys’ Deep.
-
Unlock Requirements: Completing the main quest “To the Shores End.”
-
Drops: Topological Confinement, essential for ascending characters like Camellya, Youhu, and Shorekeeper.
-
Difficulty: Manageable with a well-built team of fully ascended characters.
2. Tactical Hologram Variant (Rinascita)
-
Location: Thessaleo Falls in Rinascita.
-
Rewards: Trial Coins, Shell Credits, Tuners, and Astrites—critical for honing gear and resources.
-
Challenge Level: Far more punishing than the base variant; demands precise timing, ideal builds, and uninterrupted gameplay.
🧩 Key Boss Mechanics to Know
Resistances and Weaknesses
-
Spectro Resistance: Spectro-based characters underperform in this fight.
-
Overclock Immunity: Once Overclocked, the boss becomes highly resistant to stagger and interruption effects.
Special Mechanics of the Tactical Hologram (Level 100)
-
Precision Mechanic
Successfully dodge an attack → Grant one “Hoverpoint” stack (each stack lasts 3 seconds).
Accumulate 3 stacks → Gain Supercompute, which provides:-
+30% ATK bonus
-
Restores 5 Stamina per second
-
-
Crumble Mechanic
Starts 3 minutes into the fight:-
Boss ATK increases by 30% every 10 seconds (no cap).
-
You gain +10% ATK per 10 seconds, but maxes out.
-
Your maximum HP diminishes by 10% every 2 seconds until reaching 20% HP.
-
Knowing these timers helps determine whether to push aggressively early or conserve resources for a prolonged endurance battle.
🛡️ Recommended Team Builds
For a balanced roster, consider mixing Disruption, Burst, and Stagger capabilities:
-
Stagger Tools (e.g., Yinlin): Quickly interrupt boss flurries.
-
High Survivability (Tank/DPS hybrids): Characters like Camellya can stay in the fight longer.
-
High Mobility: Enables timely dodges for Precision stacking.
-
Bursters (ionic or physical DPS): Burst health bars rapidly before Crumble ramps up.
Avoid using Spectro-centric DPS or Resonators like Zani or Jinhsi—boss resistances will blunt their impact.
🧠 Combat Strategy & Phase Tactics
Phase 1 – Opening Moves
-
Dodge early to build initial Hoverpoint stacks.
-
Poke cautiously—use stagger or interrupt abilities to slow momentum.
-
Learn visual cues:
-
Cross-eyed flashes signal melee combos.
-
Glowing feet or surrounding orange/purple floor zones = stomps or AoE bursts.
-
Interlude – Mid battle (1–3 minutes)
-
Stay alert: hoverpoint stacking continues as long as you dodge effectively.
-
Monitor Crumble timer: once it’s active (>3 minutes), you face stacking ATK and dwindling HP.
-
Plan for burst damage windows before Crumble becomes brutal.
Final Stand – After 3 Minutes
-
Expect boss ATK to spike continuously—stamina and heals are paramount.
-
Yeah, even if you ramp up your DPS, the loss of max HP means every mistake can be fatal.
-
Burst down major health chunks fast; extend fights lead to almost guaranteed wipe
Key takeaway: be efficient, not reckless.
💡 Gameplay Best Practices
-
Pattern Recognition
Watch for the boss’s tell-tale animations. Dedicate a few runs to learning before pushing DPS builds. -
Controlled Offense
Attack in measured bursts—spam leads to missed dodges and wasted stamina. -
Maximize Dodging
Precision stacks fuel Supercompute, granting ATK and stamina regen—essential in extended fights. -
Prioritize Stagger
Characters like Yinlin disrupt boss combos, offering crucial breathing space. -
Upgrade Beforehand
Ensure your characters and gear are fully ascended and tuned. Robust builds drive success here.
🪄 Why GladiatorBoost Can Help
If this boss has you stuck, Wuthering Waves boosting at GladiatorBoost might be your next move. Our expert boosters have mastered bosses like the Fallacy of No Return and offer tailored help, from tactical walkthroughs to full run-throughs. Heading into a challenging build or need optimized teammate comps? Link directly to our GladiatorBoost boosting services to get specialized support and cut through the trial-and-error grind.
🔁 Sample Strategy Rotation
-
Dodge → Stagger combo with support character (e.g., Yinlin).
-
Switch to DPS while boss is immobilized.
-
Monitor Stamina and HP—use dodge to fill hover stacks.
-
Stay ready for phase transitions—boss powers up unpredictably.
-
Use Burst Ultimate just before Crumble urgency peaks.
-
Heal and dodge continuously once stamina is back.
-
Finish off with remaining burst once the boss is below 25% HP.
Adjust this loop based on your team’s setup and boss behavior in your specific runs.
✅ Final Checklist Before Fighting
| Preparation | Details |
|---|---|
| Team build | Include Stagger, Burst, Mobility |
| Character ascension | Fully leveled with tuned gear |
| Stamina/Healing | Enough to dodge consistently post-Crumble |
| Dungeon familiarity | Know boss tells and AoE indicators |
| Booster support | GladiatorBoost is available if needed |
🎯 Final Thoughts
Conquering the Tactical Hologram version of the Fallacy of No Return is as much about mental readiness and patience as it is about raw power. Focus on pattern recognition, build hoverpoint stacks, and channel damage bursts during windows before Crumble overwhelms you. With the right preparation—and if needed, expert help from GladiatorBoost—you’ll transform this grueling fight into another trophy on your Wuthering Waves journey.
Related Guides

Best Ash Salt Cookie Build in Cookie Run Kingdom (2026 Guide)

Best Timekeeper Cookie Build in Cookie Run Kingdom (2026 Guide)
Diablo 4 Litany of Sable Guide (2026) – Best Farming Methods and Build Uses

Diablo 4 Spine of Tathamet Farming Guide (2026)