


Vehicles set the pace of Battlefield 6. A tank with the right rounds, an IFV with the proper utilities, or a pilot with a sensible countermeasure stack can flip sectors and snowball a match. If your armor hasn’t felt dominant, it’s likely a loadout (and role) mismatch. Below are optimized builds for the big hitters—MBTs, IFVs, Mobile AA, and Attack Helicopters—plus role tips so you use each platform the way it was designed.
Table of Contents
- 1 Main Battle Tank (MBT) — Sector Breaker
- 2 Infantry Fighting Vehicle (IFV) — Flag Shredder
- 3 Mobile Anti-Air (MAA) — No-Fly Zone
- 4 Attack Helicopter — Hunter-Killer
- 5 Transport & Jets (What You Can’t Change—Yet)
- 6 Crew & Seat Coordination (Free Power-Ups)
- 7 Countermeasure Timing 101
- 8 Fast Vehicle Progression (Without the Grind)
- 9 TL;DR Loadout Cards
Main Battle Tank (MBT) — Sector Breaker

Role: Anchor the push, delete enemy armor, punish exposed infantry.
Driver Loadout
-
Main: High-Explosive (HE) Shells – fast infantry clear, deletes cover and deployables.
-
Alt Ammo: AP Shells – best-in-slot for tank/IFV duels; aim for side/rear armor.
-
Secondary: Coaxial LMG – finish stragglers, suppress AT players in windows.
-
Equipment: Projectile Intercept System – swats incoming rockets/shells in the danger window.
-
Upgrade: Reinforced Plating – extra survivability is worth the speed hit.
Gunner Seat
-
Weapon: HMG – rips infantry and light vehicles; keep it on overwatch.
-
Equipment: Mine Countermeasures – pings/detoxes your most common insta-death.
How to play it
-
Ammo discipline: HE for infantry/cover, swap to AP the second you sight armor.
-
Angle obsession: Never brawl front-to-front if you can help it—cut diagonals to expose their side armor.
-
Bubble timing: Pop Intercept when missiles are mid-flight, not preemptively; save the second charge for the follow-up volley.
-
Always bring an Engineer buddy. The best plating is a repair torch.
Infantry Fighting Vehicle (IFV) — Flag Shredder
Role: Mobile spawn, infantry farmer, opportunistic armor duelist.
Gunner synergy: Many IFVs give your gunner a designator that feeds your locks—talk to each other.
Driver Loadout
-
Primary: HE Shells – consistent infantry wipes, good splash in streets and alleys.
-
Secondary: Lock-Guided Missile – flexible vs armor and aircraft; pair with gunner designations.
-
Equipment 1: Emergency Repair – stabilizes you after a bad peek.
-
Equipment 2: Counter-Fire Radar – auto-spots whoever tagged you (hello, free revenge angle).
-
Upgrade: Reinforced Plating – lets you take a second AT hit before bailing.
How to play it
-
Edge the objective: Sit just outside cap radius and farm exits rather than face-tanking.
-
Hit-and-run: Alternate HE bursts with lock volleys, then reposition 20–30 meters; be slippery.
-
Let your gunner lead: If they laser a tank or heli, cue the lock and shoot instantly.
Mobile Anti-Air (MAA) — No-Fly Zone
Role: Air denial first, harassment second. You’ll save more tickets than you realize.
Loadout
-
Primary Ammo: High-Velocity AA Shells – easier tracking on fast movers.
-
Countermeasure: Thermal-Blocking Smoke – breaks locks and sightlines when jets roll in.
-
Upgrade: Enhanced Loading Systems – higher uptime; your entire job is sustained pressure.
How to play it
-
Pre-aim corridors: Learn the heli ingress lanes and jet run-ins; you should be firing before they fire.
-
Smoke smart: Pop after you start getting painted to deny both lock and visual.
-
Don’t brawl armor: You can chip IFVs, but an MBT will delete you—relocate instead.
Attack Helicopter — Hunter-Killer
Role: Crack open armor and roof nests, collapse a sector when ground lines stall.
Pilot Loadout
-
Primary: Aim-Guided Rockets (safe all-rounder) or Heavy Rockets (burst vs armor)
-
Secondary: Aim-Guided Missile (TOW/guided equivalents if you’re confident)
-
Equipment: Emergency Repair – clutch save after a bad dive.
-
Upgrade: Targeting Interference – scrambles lock-based AA; buys you an exit window.
How to play it
-
Strafe discipline: In, volley, out. Never hover. Use terrain to break sight and re-approach from a fresh vector.
-
Target priority: AT nests, roof MGs, and exposed armor. Every pick here multiplies your team’s ground push.
-
Respect MAA: If you hear a high-velocity cadence, you’re in an MAA cone—jink and break immediately, don’t ego it.
Transport & Jets (What You Can’t Change—Yet)
As of now, transport vehicles and jets have fixed weapon/equipment kits. Still, you can squeeze value:
-
Transport Heli: Fly low and lateral, drop squads on rooftops/behind caps, and never hover to “farm”—you’re a taxi with teeth, not a gunship.
-
Fighter/Attack Jets: Think interdiction—cut enemy air first, then ground strafe only when skies are cold. Keep a shallow exit with map edge as your safety net.
Crew & Seat Coordination (Free Power-Ups)
-
Call your ammo type aloud: “Swapping AP” tells your gunner to scan armor, not chase infantry.
-
Gunner scouts, driver commits: Gunner pings target type/direction; driver sets the angle.
-
Repair rhythm: If you drop below ~40%, reverse behind hard cover, pop Emergency Repair, then re-peek with full kit. Living > one more shell.
Countermeasure Timing 101
-
Projectile Intercept (MBT): Use mid-flight to catch the actual danger wave; you’ll often block two threats per press.
-
Thermal Smoke (MAA): Pop post-lock to deny the missile and the follow-up visual track.
-
Targeting Interference (Attack Heli): Trigger as you exit a strafe so locks break during your escape, not on entry.
Fast Vehicle Progression (Without the Grind)
Unlocking shells, locks, and plating is what turns a stock ride into a sector bully. If you’d rather skip weeks of slow XP, GladiatorBoost’s Battlefield 6 Bot Lobbies let you farm Vehicle Mastery, rocket hits, air kills, and utility counters in controlled matches. It’s ideal for speeding to HE/AP combos, Intercept Systems, Emergency Repair, and Targeting Interference, then bringing fully kitted vehicles straight into public games. Everything is done manually and securely, and your unlocks carry over immediately.
TL;DR Loadout Cards
-
MBT: HE / AP • Coax LMG • Projectile Intercept • Reinforced Plating | Gunner: HMG + Mine Countermeasures
-
IFV: HE Shells • Lock-Guided Missile • Emergency Repair • Counter-Fire Radar • Reinforced Plating | Gunner LMG/Designator
-
MAA: High-Velocity AA • Thermal-Blocking Smoke • Enhanced Loading
-
Attack Heli: Aim-Guided or Heavy Rockets • Aim-Guided Missile • Emergency Repair • Targeting Interference
Master the role each platform is built for, and your team will feel the difference in every sector tug-of-war.
Related Guides

Black Ops 7 Illicit Cargo Event Rewards Guide: Every Camo, Challenge & Unlock Explained
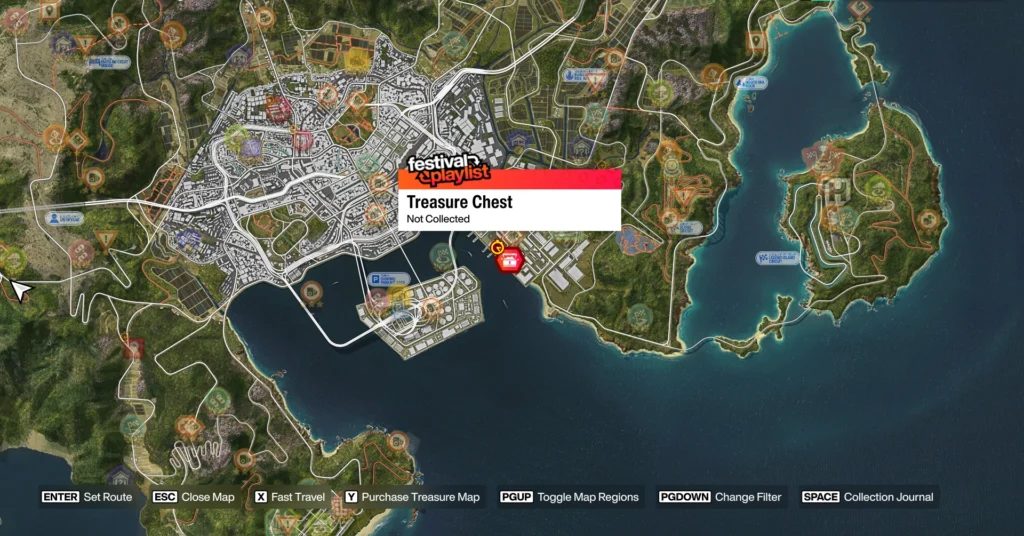
Forza Horizon 6 Treasure Hunt in Tokyo City Location (Spring) – Complete Guide
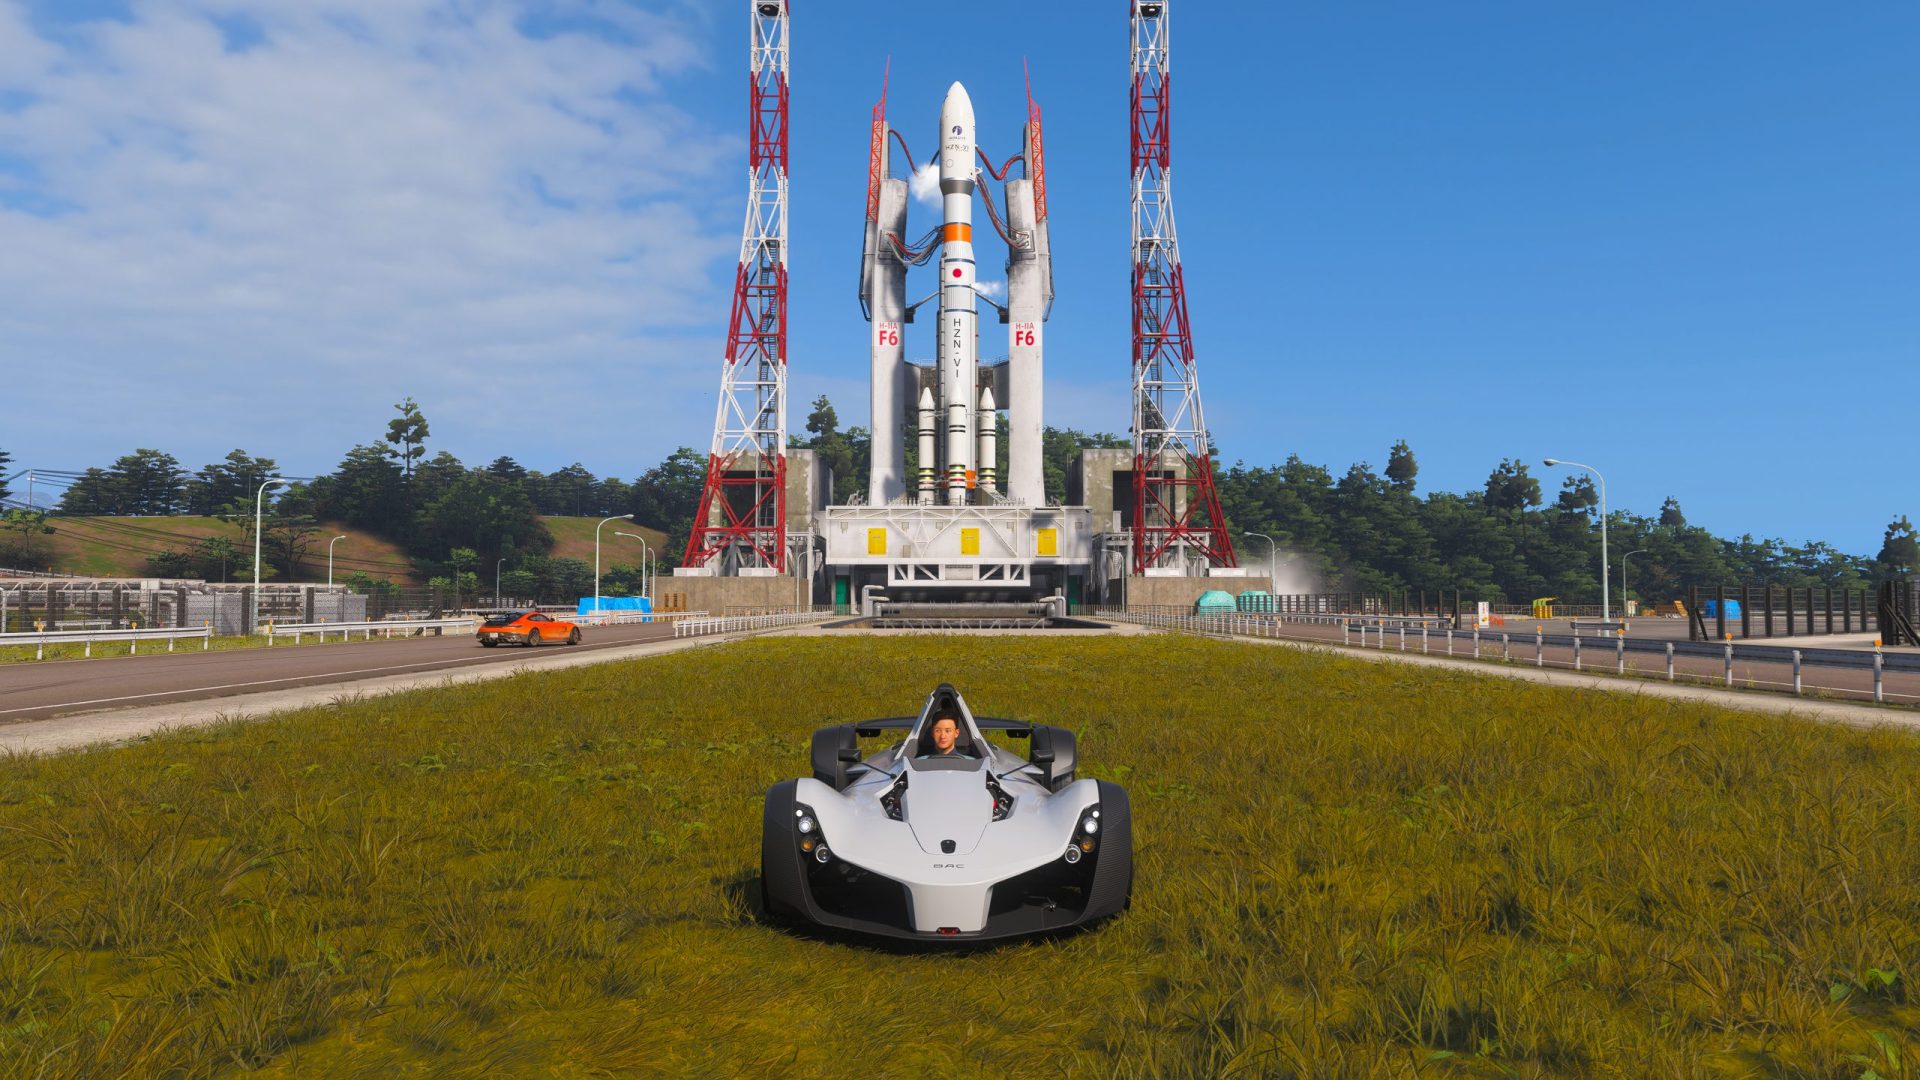
Forza Horizon 6 AstroToy Photo Challenge Guide: HZN-VI Rocket Location Explained
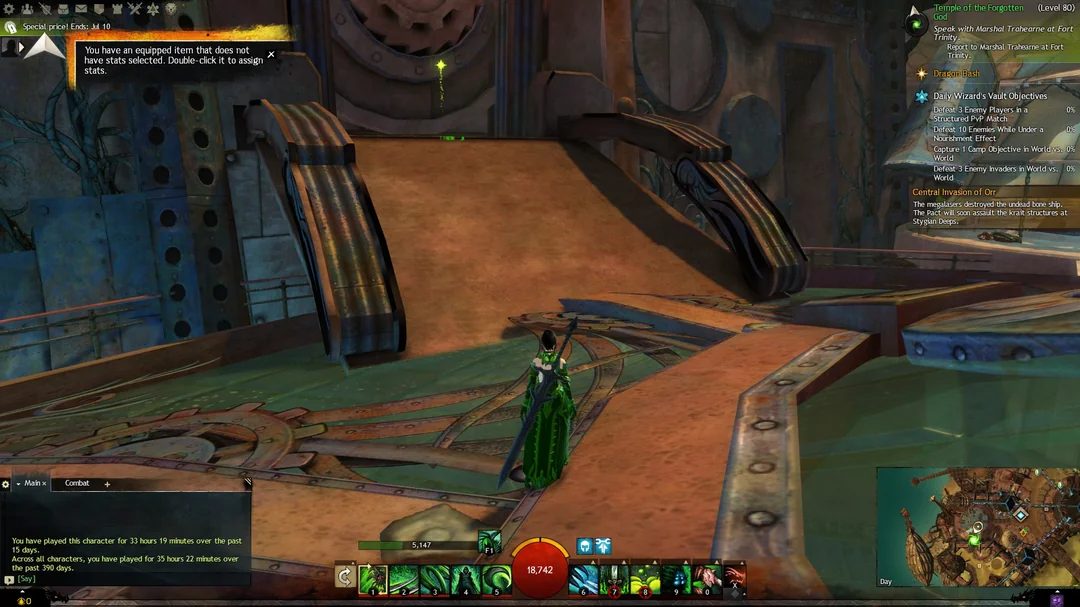
Guild Wars 2 Leveling Guide: The Fastest Ways to Reach Level 80