


Sensors are one of the most important rare materials in ARC Raiders. While they aren’t classified as ultra-rare, they’re consistently in demand because they’re required for crafting high-impact equipment like the Explosive Mine, Tagging Grenade, and most importantly, the Raider Hatch Key.
If you’re constantly running out of Sensors, this guide will show you:
-
Every reliable way to obtain them
-
The best farming locations
-
A fast reset route for efficient grinding
-
Safe extraction tips
Let’s break it down.
Table of Contents
- 1 Method 1: Buy Sensors from Vendors
- 2 Method 2: Farming Sensors on Topside
- 3 Best Farming Location: Stella Montis
- 4 Secondary Farming Spot: Pilgrim’s Peak (Blue Gate)
- 5 Full List of Sensor Spawn Locations
- 6 Fast Sensor Farming Route (Step-by-Step)
- 7 Risk Management Tips
- 8 Is Buying or Farming Better?
- 9 Final Thoughts
What Are Sensors Used For?
Sensors are Topside technology components typically found in Technological and Security areas. Their crafting importance makes them a high-priority farm material for both solo Raiders and squads.
You’ll primarily need Sensors for:
-
Raider Hatch Keys (fast extractions)
-
Tactical gadgets
-
Utility-based explosives
Because Hatch Keys are essential for secure exits, having a steady supply of Sensors can significantly improve your survival rate in raids. Players looking to optimize progression often combine farming with ARC Raiders Boosting to accelerate resource acquisition safely.
Method 1: Buy Sensors from Vendors
The most straightforward method is purchasing Sensors directly.
Vendor Option – Celeste
-
Cost: 10 Seeds per Sensor
-
Daily Stock: 5 Sensors
-
Stock refreshes daily
This guarantees up to five Sensors per day, assuming you have enough Seeds.
Should You Buy Them?
Pros:
-
Reliable
-
No raid risk
-
No time investment
Cons:
-
Costs Seeds
-
Limited quantity
If you’re focused on combat progression or blueprint crafting, you may prefer spending Seeds elsewhere and farming Sensors in raids instead.
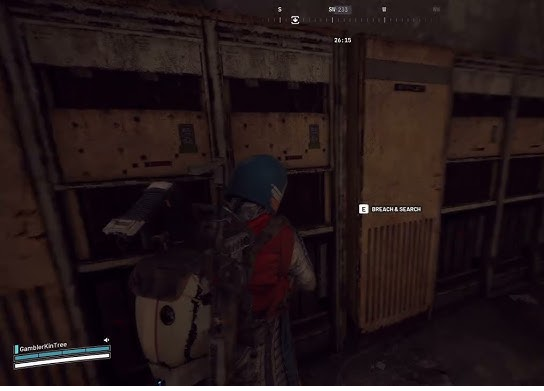
Method 2: Farming Sensors on Topside
Farming is where you’ll acquire Sensors in bulk.
Sensors most commonly spawn in:
-
Breachable metal cabinets
-
Technological facilities
-
Security-heavy structures
-
Research zones
These cabinets also drop Processors and other valuable tech components.
Best Farming Location: Stella Montis
If you’re looking for a consistent route, Stella Montis is your top-tier farming map.
Priority Areas:
-
Assembly Workshop
-
Medical Research
Both buildings contain multiple breachable cabinets and drawers packed with tech loot.
Efficient Farming Strategy
-
Bring only a Raider Hatch Key in your Safe Pocket.
-
Avoid bringing expensive gear.
-
If you spawn far from Assembly Workshop — surrender immediately.
-
If you spawn nearby — rush the building.
-
Breach all cabinets.
-
Loot every drawer and shelf.
-
Extract using the nearby hatch east of Assembly.
This reset strategy minimizes risk and maximizes efficiency.
You can easily gather 1–2 full stacks of Sensors per successful run, alongside other technological materials.
If you want to skip the grind entirely, you can also Buy ARC Raiders Materials directly to accelerate crafting.
Secondary Farming Spot: Pilgrim’s Peak (Blue Gate)
Pilgrim’s Peak is another strong option.
Why It’s Good:
-
High cabinet density
-
Technological loot clusters
-
Solid Sensor drop rates
The Risk:
This area is heavily patrolled by ARCs — especially aggressive types like Fireball units.
If you’re farming here:
-
Bring mid-tier combat gear
-
Clear slowly
-
Listen for mechanical movement
-
Avoid prolonged engagements
Pilgrim’s Peak offers great returns but requires stronger map control.
Full List of Sensor Spawn Locations
Sensors can spawn in multiple maps wherever technological and security facilities exist.
Dam Battlegrounds
-
Hydroponic Dome Complex
-
Control Tower
-
Research & Administration
Spaceport
-
Arrival Building
-
Departure Building
-
Launch Towers
-
Control Tower A6
-
North Trench Tower
-
South Trench Tower
Buried City
-
Research
-
Space Travel
The Blue Gate
-
Pilgrim’s Peak
-
Reinforced Reception
-
Security Wing
-
Ancient Fort
Stella Montis
-
Lobby Metro
-
Sandbox
-
Communications
-
Lobby
-
Assembly
-
Assembly Workshops
-
Medical Research
While all of these can spawn Sensors, Stella Montis remains the most time-efficient route due to cabinet density and nearby hatch extraction.
Fast Sensor Farming Route (Step-by-Step)
Here’s a streamlined farming loop:
Step 1: Minimal Loadout
-
Bring basic weapon
-
Carry Raider Hatch Key in Safe Pocket
-
Avoid unnecessary equipment
Step 2: Spawn Check
-
If spawn is far from Assembly → surrender
-
If spawn is close → proceed
Step 3: Cabinet Sweep
-
Breach all metal cabinets
-
Check side rooms and corners
-
Loot drawers and shelves
Step 4: Secure Extraction
-
Move east of Assembly Workshop
-
Locate hatch extraction
-
Exit immediately once inventory fills
Repeat this cycle for steady Sensor accumulation.
Risk Management Tips
Even during farming runs, survival matters.
-
Avoid prolonged PvP engagements.
-
Don’t overloot beyond your inventory capacity.
-
Use sound cues to detect incoming Raiders.
-
Watch for shield sparks in open areas (especially during Hurricane conditions).
If you’re consistently dying before extraction, it may be worth upgrading your gear. Some players prefer to Buy ARC Raiders Items to ensure stronger survivability during resource runs.
Is Buying or Farming Better?
It depends on your goal.
Buy Sensors If:
-
You only need a few
-
You have excess Seeds
-
You want zero risk
Farm Sensors If:
-
You need bulk quantities
-
You’re crafting multiple Hatch Keys
-
You want additional tech materials
The most efficient approach often combines both methods — buy daily vendor stock and farm in focused sessions.
Final Thoughts
Sensors are a critical crafting material in ARC Raiders, especially for Raider Hatch Keys and tactical gadgets. Fortunately, they’re not locked behind extreme rarity — they just require efficient routing.
To summarize:
-
Buy up to 5 daily from Celeste.
-
Farm Stella Montis Assembly Workshop for highest efficiency.
-
Use minimal-risk reset strategy.
-
Extract via hatch for safe exits.
-
Consider Pilgrim’s Peak for alternative high-yield runs.
With the right route and risk management, you can build a healthy Sensor stockpile in just a few sessions.
Related Guides

ARC Raiders Red Coral Jewelry Farming Guide: Best Locations and Fastest Loot Routes

Best Early Cars in Forza Horizon 6: Fastest Budget Unlocks for New Players

Forza Horizon 6 House Locations Guide: Every Home, Price, Perk, and Unlock Requirement

Black Ops 7 Zombies Wonder Weapons Ranked: The Ultimate Tier List