


Arknights Endfield Pressure Sensitive Guide – Delver of the Cryptic Puzzle Walkthrough

The Delver of the Cryptic event in Arknights: Endfield introduces players to isolated puzzle chambers that test movement, logic, and environmental awareness. While some rooms are timed challenges, others—like Pressure Sensitive—focus entirely on manipulating objects to unlock the path forward.
This guide will walk you step-by-step through the Pressure Sensitive puzzle, including how to access all hidden chests and reach the exit efficiently.
Table of Contents
- 1 How the Pressure Sensitive Puzzle Works
- 2 Step 1: The Opening Jump
- 3 Step 2: Elevator and First Pressure Plate
- 4 Step 3: Large Crate and First Hidden Chest
- 5 Step 4: Unlocking the Exterior Path
- 6 Step 5: Second Hidden Chest
- 7 Step 6: Jumping Over the Closed Gate
- 8 Step 7: Elevator to Final Plate
- 9 Step 8: Final Chest and Exit Portal
- 10 Tips for Completing Pressure Sensitive Faster
- 11 Preparing for Later Delver of the Cryptic Stages
- 12 Is Pressure Sensitive Difficult?
- 13 Final Thoughts
How the Pressure Sensitive Puzzle Works
The core mechanic of this stage revolves around:
-
Floating crates that can be pushed or repositioned
-
Pressure plates that activate when weighted
-
Gates and elevators that unlock after switches are triggered
Your objective is simple in theory: move crates onto pressure plates to open pathways. However, the layout introduces verticality, backtracking, and multi-room navigation that can easily confuse first-time players.
Step 1: The Opening Jump
At the start, you’ll see a small floating crate near a short ledge.
-
Push the crate slightly forward.
-
Use it as a step to clear the small jump.
This opening section is designed to teach basic crate movement mechanics. No tricks here—just positioning.
Step 2: Elevator and First Pressure Plate
In the next area, you’ll find:
-
A floating crate at the bottom level
-
An elevator nearby
Move the crate onto the elevator platform. Activate it to ride both your character and the crate to the upper floor.
At the top:
-
Place the crate onto the pressure plate.
-
This unlocks the first gate leading to the next section.
This introduces vertical crate transport—an important mechanic for later segments.
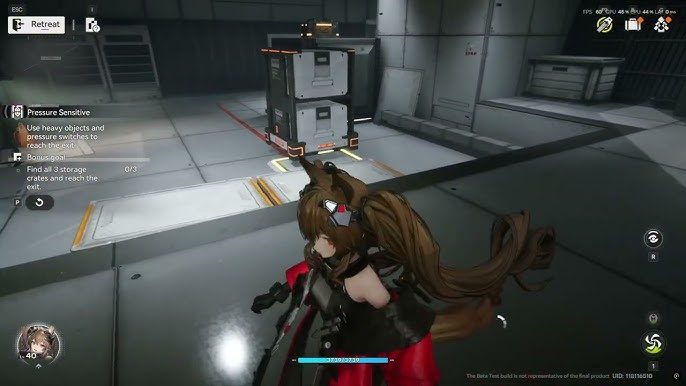
Step 3: Large Crate and First Hidden Chest
You’ll now encounter a larger floating crate.
-
Push the large crate to the pressure plate at the end of the room.
-
This opens another gate.
Before progressing, use the large crate’s height to reach the first hidden chest in this stage. Positioning matters—adjust carefully until you can climb to the reward.
Step 4: Unlocking the Exterior Path
After passing through the gate:
-
Turn right.
-
Continue following the right-hand path.
-
You’ll find a rear exit door.
Open this door to create a shortcut and move the large crate outside the building. This is a key step—many players forget to open the back route, forcing unnecessary backtracking.
Step 5: Second Hidden Chest
Before placing the large crate on its final pressure plate, use it again to access the second hidden chest.
Look for elevated terrain near the exterior area. Position the crate precisely to reach it.
Exploring carefully is essential—some Delver of the Cryptic rooms hide up to three crates, though Pressure Sensitive contains two major reward points.
Step 6: Jumping Over the Closed Gate
Now return to the main exterior gate area.
-
Place the large crate in front of the first closed gate.
-
Use it to jump over the barrier.
On the other side, you’ll find:
-
A pressure switch
-
A mechanism that unlocks the earlier blocked path
Activating this allows the large crate to be moved freely between sections.
Step 7: Elevator to Final Plate
Bring the large crate to the elevator near the newly opened gate.
-
Ride it upward.
-
Place the crate on the final pressure plate at the top level.
This unlocks the last gate and reveals the final area.
Step 8: Final Chest and Exit Portal
In the final chamber, you’ll find:
-
The last reward chest
-
The glowing exit portal
Collect your rewards and step through the portal to complete the Pressure Sensitive stage of the Delver of the Cryptic event.
Tips for Completing Pressure Sensitive Faster
Although this stage isn’t combat-focused, efficiency still matters—especially if you’re clearing event content quickly.
1. Plan Crate Routes in Advance
Before pushing a crate, look at all nearby pressure plates and elevations. Sometimes it’s faster to reposition once than to move a crate multiple times.
2. Open Shortcuts Early
The rear door is crucial. Unlocking alternative paths prevents time-consuming backtracking.
3. Prioritize Chests Before Final Placement
Always collect hidden rewards before locking a crate into its final pressure plate position.
Preparing for Later Delver of the Cryptic Stages
While Pressure Sensitive is puzzle-based, later event content can include tougher combat sections. Strengthening your roster ensures smoother progression through time-limited stages.
Many players optimize their squads using:
-
Arknights Endfield Operator Build Boost – Ideal for fine-tuning skill trees and gear setups.
-
Arknights Endfield Operator Level Boost – Helps quickly raise Operator power to meet scaling event difficulty.
If you’re aiming to complete every Delver chamber before the event ends, improving Operator performance can save significant time.
Is Pressure Sensitive Difficult?
Compared to later Delver puzzles, Pressure Sensitive serves as a mechanical introduction. The difficulty lies more in:
-
Understanding vertical crate movement
-
Remembering unlocked shortcuts
-
Efficiently grabbing hidden chests
Once you grasp the pressure plate system, the rest becomes a matter of positioning and patience.
Final Thoughts
The Pressure Sensitive puzzle in Arknights: Endfield is a smart introduction to the Delver of the Cryptic event. It teaches object manipulation, layered navigation, and environmental awareness without overwhelming players.
To recap:
-
Use small crates for early jumps.
-
Transport crates via elevators.
-
Unlock shortcuts before final placements.
-
Collect both hidden chests before finishing.
-
Use the final pressure plate to access the exit portal.
Mastering this stage builds the foundation for more complex puzzles ahead.
Related Guides

ARC Raiders Red Coral Jewelry Farming Guide: Best Locations and Fastest Loot Routes

Best Early Cars in Forza Horizon 6: Fastest Budget Unlocks for New Players

Forza Horizon 6 House Locations Guide: Every Home, Price, Perk, and Unlock Requirement

Black Ops 7 Zombies Wonder Weapons Ranked: The Ultimate Tier List