


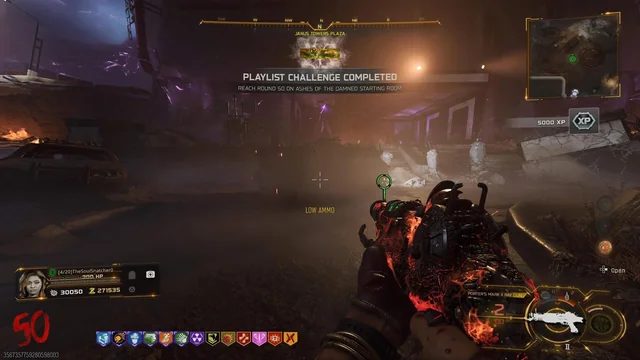
Season 2 of Call of Duty: Black Ops 7 introduces one of the most punishing Zombies challenges yet: Starting Room. This mode strips players of nearly every safety net they’re used to and asks one simple question—how long can you survive with almost nothing?
You’re locked into the spawn area of Ashes of the Damned or Astra Malorum, facing endless zombie waves with no map progression. With exclusive rewards tied to reaching Rounds 10, 25, and 50, preparation and decision-making matter more here than in any standard Zombies experience.
Below are the best Starting Room tips for Black Ops 7 Zombies, rewritten entirely in original form and tested for long-round survival.
Table of Contents
- 1 Learn the Starting Room Layout Immediately
- 2 Know What’s Missing (and What Isn’t)
- 3 The Mystery Box Is Your Only Real Progression
- 4 Quick Revive + Dying Wish Is Mandatory
- 5 Use GobbleGums If You’re Serious About High Rounds
- 6 Power-Ups Are No Longer Optional
- 7 Want Guaranteed Rewards Without the Stress?
- 8 Final Survival Checklist
Learn the Starting Room Layout Immediately
Your first priority should be understanding the space you’re trapped in. Both maps offer just enough room to survive—but only if you use them correctly.
Ashes of the Damned
This starting room favors long, linear training. The roadways leading toward locked exits give you space to funnel zombies into predictable lines. Avoid corners and use the open stretch to keep distance between you and the horde.
Astra Malorum
Here, vertical movement matters. The area around Ol’ Tessie is ideal, letting you vault over the car to reset zombie paths. The nearby steps provide elevation changes that help break encirclements without cutting off escape routes.
👉 Pro Tip: Open the Tac Map early and decide where you’ll run before the rounds speed up. Improvising later usually ends in a down.
Know What’s Missing (and What Isn’t)
Starting Room mode removes most of the systems Zombies players rely on—and understanding those limits is key to surviving.
What You Don’t Get
-
No Pack-a-Punch
-
No Der Wunderfizz
-
No Armor wall buys or upgrades
-
No crafting tables or salvage
-
No T.E.D.D. tasks
You will not receive surprise unlocks at higher rounds. If you reach Round 30, the game won’t suddenly reward you for it.
What You Don’t Have to Worry About
The upside? No Elite Enemies spawn in Starting Room. That means:
-
No Uber Klaus
-
No Zursa Bears
-
No O.S.C.A.R.S
From Round 16 onward, difficulty increases only through zombie health, speed, and damage—not special threats. This makes training more predictable once you adjust.
The Mystery Box Is Your Only Real Progression
With Pack-a-Punch unavailable, the Mystery Box becomes the heart of your run.
Why You Should Spin Early and Often
-
Guaranteed to spawn from Round 1
-
Can drop Rarity Tools, upgrading weapons up to Legendary
-
Only source of Wonder Weapons
Spending Essence anywhere else is usually a mistake. If your gun falls behind, your run ends.
Best Wonder Weapon Choice
The Ray Gun Mark II is the safest and most reliable option:
-
High damage output
-
No splash damage (huge for tight rooms)
-
Allows sprinting while firing
Be aware that Wonder Weapon ammo refills cost 10,000 Essence, so plan your spending carefully.
Map-Specific Alternatives
-
Necrofluid Gauntlet (Ashes of the Damned)
-
LGM-1 (Astra Malorum)
Both are extremely rare but powerful in the right hands.
Quick Revive + Dying Wish Is Mandatory
Quick Revive is the only perk machine available in Starting Room, which makes perk augments more important than ever.
Why Dying Wish Is Essential
Equipping Dying Wish on Quick Revive before entering the match gives you:
-
Temporary immunity when reduced to 1 HP
-
A full save from an otherwise guaranteed down
Since you only get one Self-Revive Kit and cannot craft more, Dying Wish effectively gives you three extra chances to survive. Each activation consumes Quick Revive, but rebuying it is a small price to pay.
Without Dying Wish, Round 25+ becomes brutally unforgiving.
Use GobbleGums If You’re Serious About High Rounds
While Starting Room removes most progression systems, GobbleGums still work—and they can completely change your odds.
High-Impact GobbleGums
-
On the House / Perkaholic – Grants perks without machines
-
Armor Gettin’ – Provides a full 3-Plate Armor Vest
-
Crate Power – Next Mystery Box weapon is Pack-a-Punched
These are Legendary GobbleGums, but this is exactly the mode they’re designed for. Saving them forever helps no one—use them when the reward is on the line.
Power-Ups Are No Longer Optional
In normal Zombies, Power-Ups are often ignored. In Starting Room, they can decide the run.
Priority Power-Ups
-
Nuke – Instantly clears the horde or ends the round
-
Max Ammo – Saves you from costly ammo refills
-
Insta-Kill – Lets weak weapons stay viable for 30 seconds
If a Power-Up drops, it’s usually worth adjusting your route to grab it safely.
Want Guaranteed Rewards Without the Stress?
Reaching Round 50 in Starting Room is no small feat. If you’re short on time—or just want those exclusive rewards without dozens of failed attempts—Black Ops 7 Boosting at GladiatorBoost offers professional Zombies services. From high-round completions to challenge unlocks, GladiatorBoost helps players secure rewards efficiently while avoiding frustration.
Final Survival Checklist
-
Choose your training spot before Round 5
-
Spend Essence primarily on the Mystery Box
-
Prioritize Ray Gun Mark II when possible
-
Always run Quick Revive with Dying Wish
-
Don’t hoard GobbleGums—use them
-
Treat Power-Ups as lifesavers, not bonuses
Starting Room in Black Ops 7 Zombies is pure survival skill. With the right preparation and smart decisions, Round 50 is achievable—but only if you respect how unforgiving the mode truly is.
Related Guides

ARC Raiders Red Coral Jewelry Farming Guide: Best Locations and Fastest Loot Routes

Best Early Cars in Forza Horizon 6: Fastest Budget Unlocks for New Players

Forza Horizon 6 House Locations Guide: Every Home, Price, Perk, and Unlock Requirement

Black Ops 7 Zombies Wonder Weapons Ranked: The Ultimate Tier List