


Arena 6 (Builder’s Workshop) is where the game begins to punish sloppy cycles and reward clean fundamentals. You’ll face cheap cycle pressure, early beatdown, and a lot of spell bait. Below are curated, easy-to-pilot decks that thrive at this trophy band, with clear win conditions, rotation tips, and counters. Pick one that fits your style, master the flow, and you’ll be in Arena 7 before you know it.
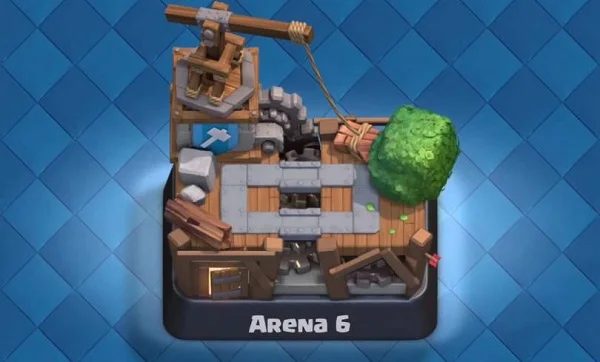
Table of Contents
- 1 1) Hog Barrel Bait (3.3 Average Elixir)
- 2 2) Classic Giant Beatdown (3.3 Average Elixir)
- 3 3) Giant Tombstone Control (3.8 Average Elixir)
- 4 4) PEKKA + Battle Ram Control (3.4 Average Elixir)
- 5 5) Battle Ram Cycle (2.9 Average Elixir)
- 6 6) Inferno Valk Bait (3.4 Average Elixir)
- 7 7) Giant + Baby Dragon Double-Push (3.0 Average Elixir)
- 8 8) Mortar Knight Pressure (2.8 Average Elixir)
- 9 Matchup & Macro Tips for Arena 6
- 10 Need a Shortcut?
- 11 Which Deck Should You Choose?
1) Hog Barrel Bait (3.3 Average Elixir)
Cards: Hog Rider, Goblin Barrel, Musketeer, Fire Spirit, Skeleton Army, Inferno Tower, Fireball, Zap
Plan: Chip relentlessly. Hog Rider draws building-targeters and tower focus while Goblin Barrel punishes their spell timing. Musketeer handles air and supports pushes from mid.
How to play:
-
Open with Fire Spirit at the bridge or Hog at 4–5 elixir to test defenses.
-
Bait Zap/Arrows using Skeleton Army or Barrel; when their small spell is down, immediately pressure opposite lane with Hog.
-
Inferno Tower is your tank answer—hold it for Giant/PEKKA and place 3–4 tiles from the river to pull.
-
Fireball + Zap deletes glass cannons after a failed push, letting you counter-push with Hog.
Common pitfalls: Tossing Barrel straight on the crown often gets perfect spelled. Mix placements (front, far left/right, deep) to force misplays.
2) Classic Giant Beatdown (3.3 Average Elixir)
Cards: Giant, Mini PEKKA, Bomber, Musketeer, Archers, Spear Goblins, Fireball, Goblins
Plan: Defend first, convert to a counter-push with Giant in front. Your support squad shreds whatever’s left after defense.
How to play:
-
Answer their push cheaply (Mini PEKKA for tanks, Bomber for swarms).
-
Drop Giant behind king tower only when you’ve earned a 2–3 card support queue (Bomber → Musketeer → Archers).
-
Fireball their ranged pile on your Giant; don’t hesitate to Fireball Skeleton Army if it protects your 7–10 elixir push.
Weakness & fix: Skeleton Army on your Giant. Keep Bomber in cycle or pre-log-equivalent with Fireball when predicting.
3) Giant Tombstone Control (3.8 Average Elixir)
Cards: Giant, Mini PEKKA, Musketeer, Baby Dragon, Skeleton Army, Tombstone, Fireball, Arrows
Plan: Win on defense, then walk the field. Tombstone stalls and splits pushes; Baby Dragon clears swarms; Mini PEKKA deletes tanks.
How to play:
-
Versus rush, set Tombstone early to disrupt win conditions and feed Skeletons.
-
Baby Dragon behind Giant answers Minions/Skarmy.
-
Cycle Arrows quickly if they swarm both lanes; protect Musketeer—she’s your air insurance.
Tip: Place Tombstone slightly toward the lane you expect pressure; it improves pulls and buys Musketeer time.
4) PEKKA + Battle Ram Control (3.4 Average Elixir)
Cards: PEKKA, Battle Ram, Witch, Knight, Bats, Skeletons, Zap, Cannon
Plan: Reactive deck. Defend with PEKKA/Witch cores, then escort Battle Ram once the bridge is safe. Win through counter-pushes rather than blind aggression.
How to play:
-
Use PEKKA strictly as a defensive wall vs. Hog, Giant, Knight, Valk.
-
Witch spawns Skeletons to distract and swat air; drop Ram behind PEKKA right as she crosses mid to force split answers.
-
Zap resets Inferno and cleans Skarmy/Bats to guarantee Ram connections.
Double elixir: Start staggering PEKKA in the back to force them to commit; then split-lane with Ram if they overspend on one side.
5) Battle Ram Cycle (2.9 Average Elixir)
Cards: Battle Ram, Knight, Minions, Fire Spirit, Electro Spirit, Goblin Cage, Arrows, Fireball
Plan: Speed. Ram is the win condition; cheap troops cycle you back to it every ~10–12 elixir. Goblin Cage anchors defense.
How to play:
-
Spam Electro/Fire Spirit to keep hand light and chip value units.
-
Knight + Minions clean most midsize pushes; Cage counters Hog/Giant and sets up Ram rushes in the lane they just spent in.
-
Arrows for Skarmy/Minion Horde; Fireball for Musketeer/Witch and tower chip when Ram connects.
Pro tip: During double elixir, you can stack two Knights or Minions with consecutive Rams—overwhelms early Arena toolkits.
6) Inferno Valk Bait (3.4 Average Elixir)
Cards: Goblin Barrel, Valkyrie, Musketeer, Fire Spirit, Inferno Tower, Fireball, Arrows, Skeleton Army
Plan: Cycle Barrel for chip, bait small spells with Skarmy/Fire Spirit, and hold Inferno for tanks. Valkyrie solves ground swarms and protects Musketeer.
How to play:
-
Tank & Toss: drop Valk at the bridge to soak, then send Barrel slightly off-center to break auto-aim and punish delayed spells.
-
If they show Arrows for Skarmy, immediately Barrel; if they Zap Barrel, Skarmy on offense becomes lethal.
-
Fireball their defensive Musketeer/Witch to enable Barrel damage.
Mistake to avoid: Don’t stack Musketeer and Valk into Fireball value—stagger placements 2–3 tiles apart.
7) Giant + Baby Dragon Double-Push (3.0 Average Elixir)
Cards: Giant, Baby Dragon, Knight, Archers, Skeleton Army, Arrows, Zap, Ice Spirit
Plan: Slow first minute, then ramp. Defend with Knight/Archers/Skarmy, and during double elixir set a double Giant or split-lane push.
How to play:
-
Ice Spirit buys clutch freeze seconds for defense or Ram/Hog stalls.
-
Start Giant in back once you’re up a card; follow with Baby Dragon + Archers; save Skarmy for counter-counters.
-
If they overcommit to stop your first Giant, drop second Giant at bridge or pressure opposite lane.
Counter tip: Mini PEKKA giving you trouble? kite with Ice Spirit + Skarmy, then Arrows if they pre-Zap.
8) Mortar Knight Pressure (2.8 Average Elixir)
Cards: Mortar, Knight, Archers, Tombstone, Bats, Fireball, Electro Spirit, Zap
Plan: Siege-lite. Mortar locks tower from your side; Knight/Archers protect the structure while Tombstone disrupts pathing.
How to play:
-
Place Mortar one tile from river defensively at first; if they waste tank counters, switch to offensive Mortar next cycle.
-
E-Spirit + Zap removes Bats/Skarmy to keep Mortar locked.
-
Use Tombstone to pull Hog/Giant into Knight and Archers’ firing lines.
Win condition: Alternating between defensive and offensive Mortar keeps opponents guessing and bleeds towers with chip.
Matchup & Macro Tips for Arena 6
-
Track two cards: their small spell (Zap/Arrows) and hard tank answer (Inferno Tower/Mini PEKKA). Punish the moment either is out of cycle.
-
Elixir discipline: avoid dropping 7–10 elixir pushes at the back when down on elixir—you’ll get bridge-punished.
-
Spell math: Fireball on a Musketeer/Witch that also clips tower is almost always worth it if it enables win-condition damage.
-
Placement mastery: off-center Barrels, high Inferno Towers, and anti-Fireball spacing win games at this stage.
Need a Shortcut?
Running into hard counters or stuck at a trophy wall? GladiatorBoost’s Clash Royale Boosting pairs you with seasoned ladder specialists who can push your account through tough arenas, complete win-streak goals, or coach you on one of the decks above. It’s a time-saver if your schedule is tight, and you keep all rewards along the way.
Which Deck Should You Choose?
-
Like control? PEKKA Ram or Giant Tombstone.
-
Prefer speed? Battle Ram Cycle or Hog Barrel Bait.
-
Want simple, sturdy wins? Giant Beatdown or Giant + Baby Dragon.
-
Enjoy structure play? Mortar Knight.
Master one list for a week—learn its defense first, then optimize pressure patterns. Consistency beats constant switching.
Related Guides
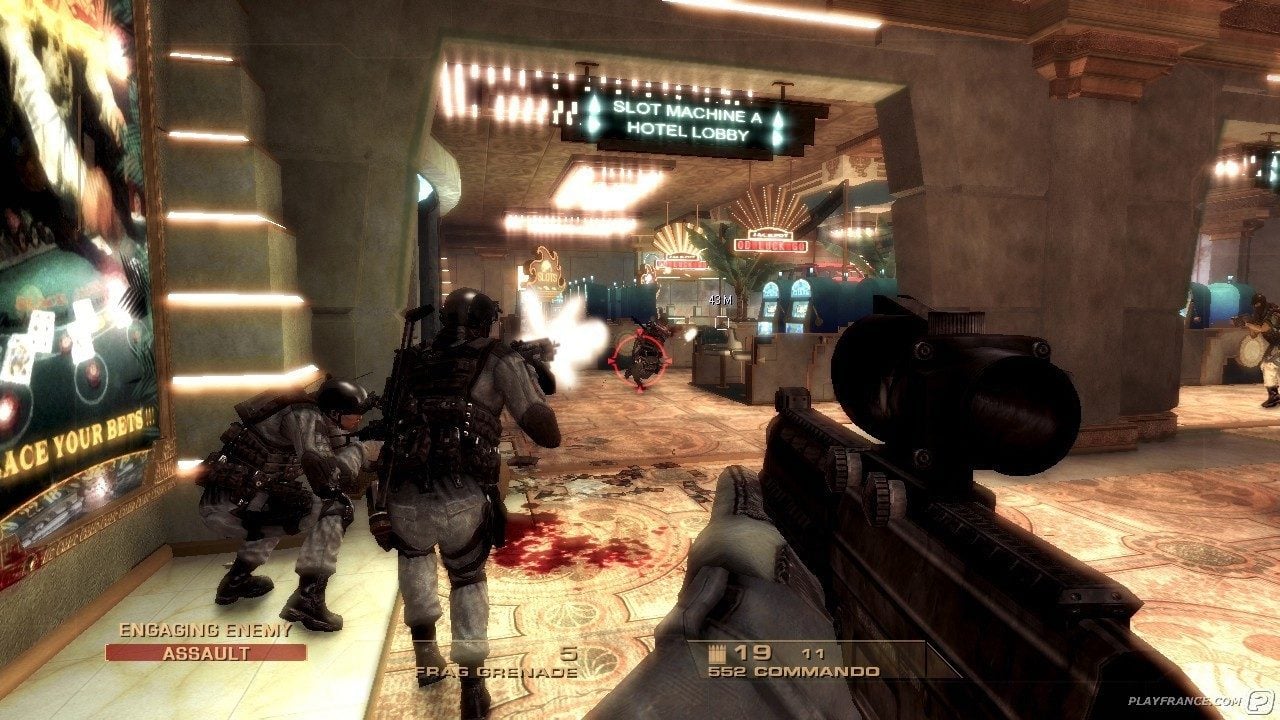
Rainbow Six Siege Calypso Casino Guide: Best Strategies, Operators & Site Setups

Black Ops 7 Illicit Cargo Event Rewards Guide: Every Camo, Challenge & Unlock Explained
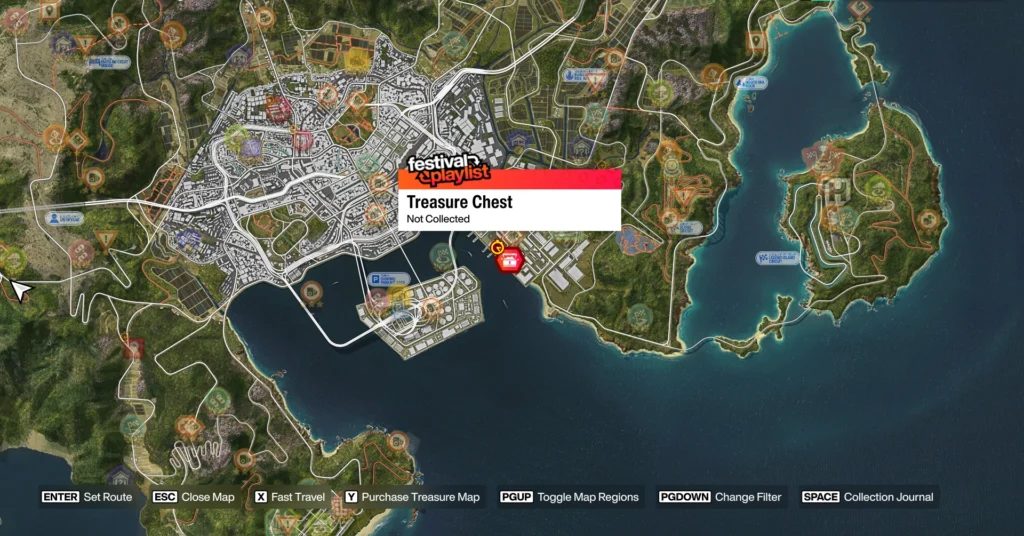
Forza Horizon 6 Treasure Hunt in Tokyo City Location (Spring) – Complete Guide
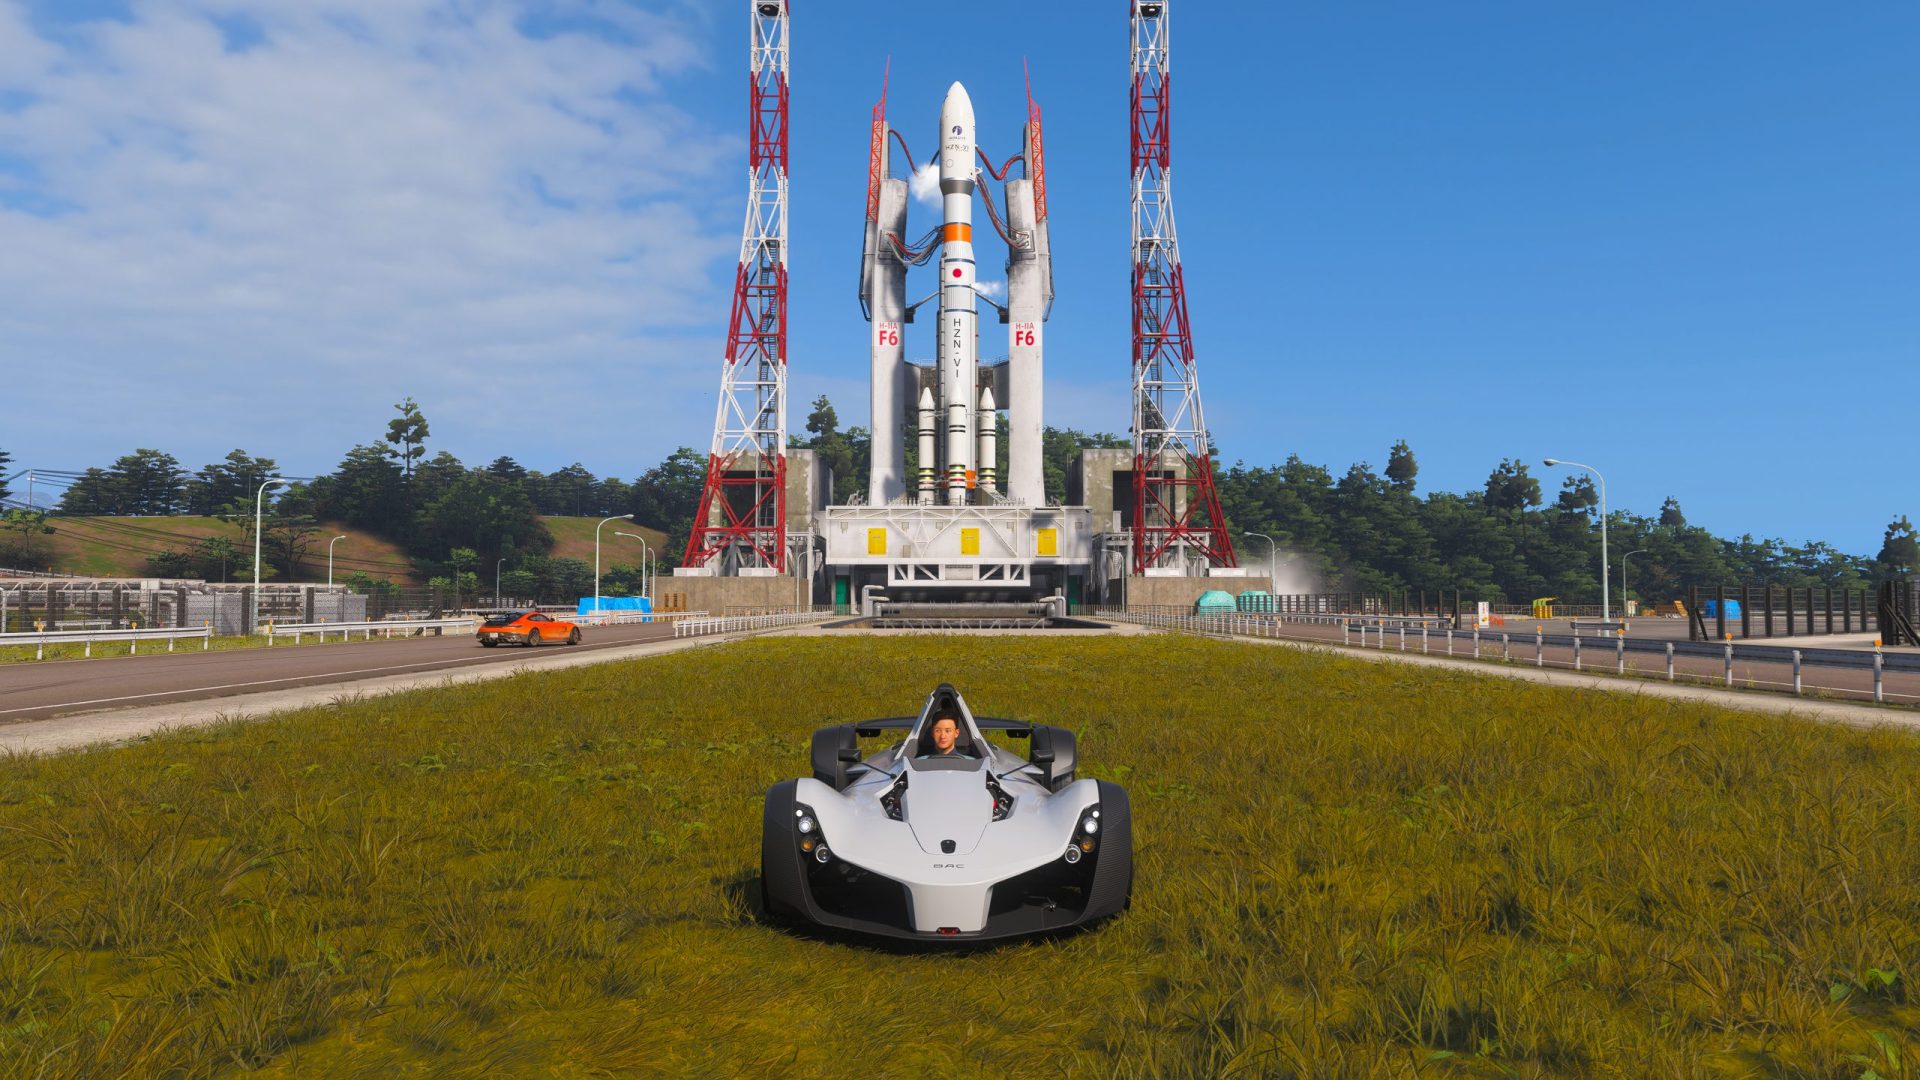
Forza Horizon 6 AstroToy Photo Challenge Guide: HZN-VI Rocket Location Explained