


Armor passives in Helldivers 2 play a huge role in how you survive and perform on missions. They can influence healing effectiveness, survivability, recoil control, and much more. Here’s a hardened tier breakdown to help you choose the best passive for your loadout and tactics.
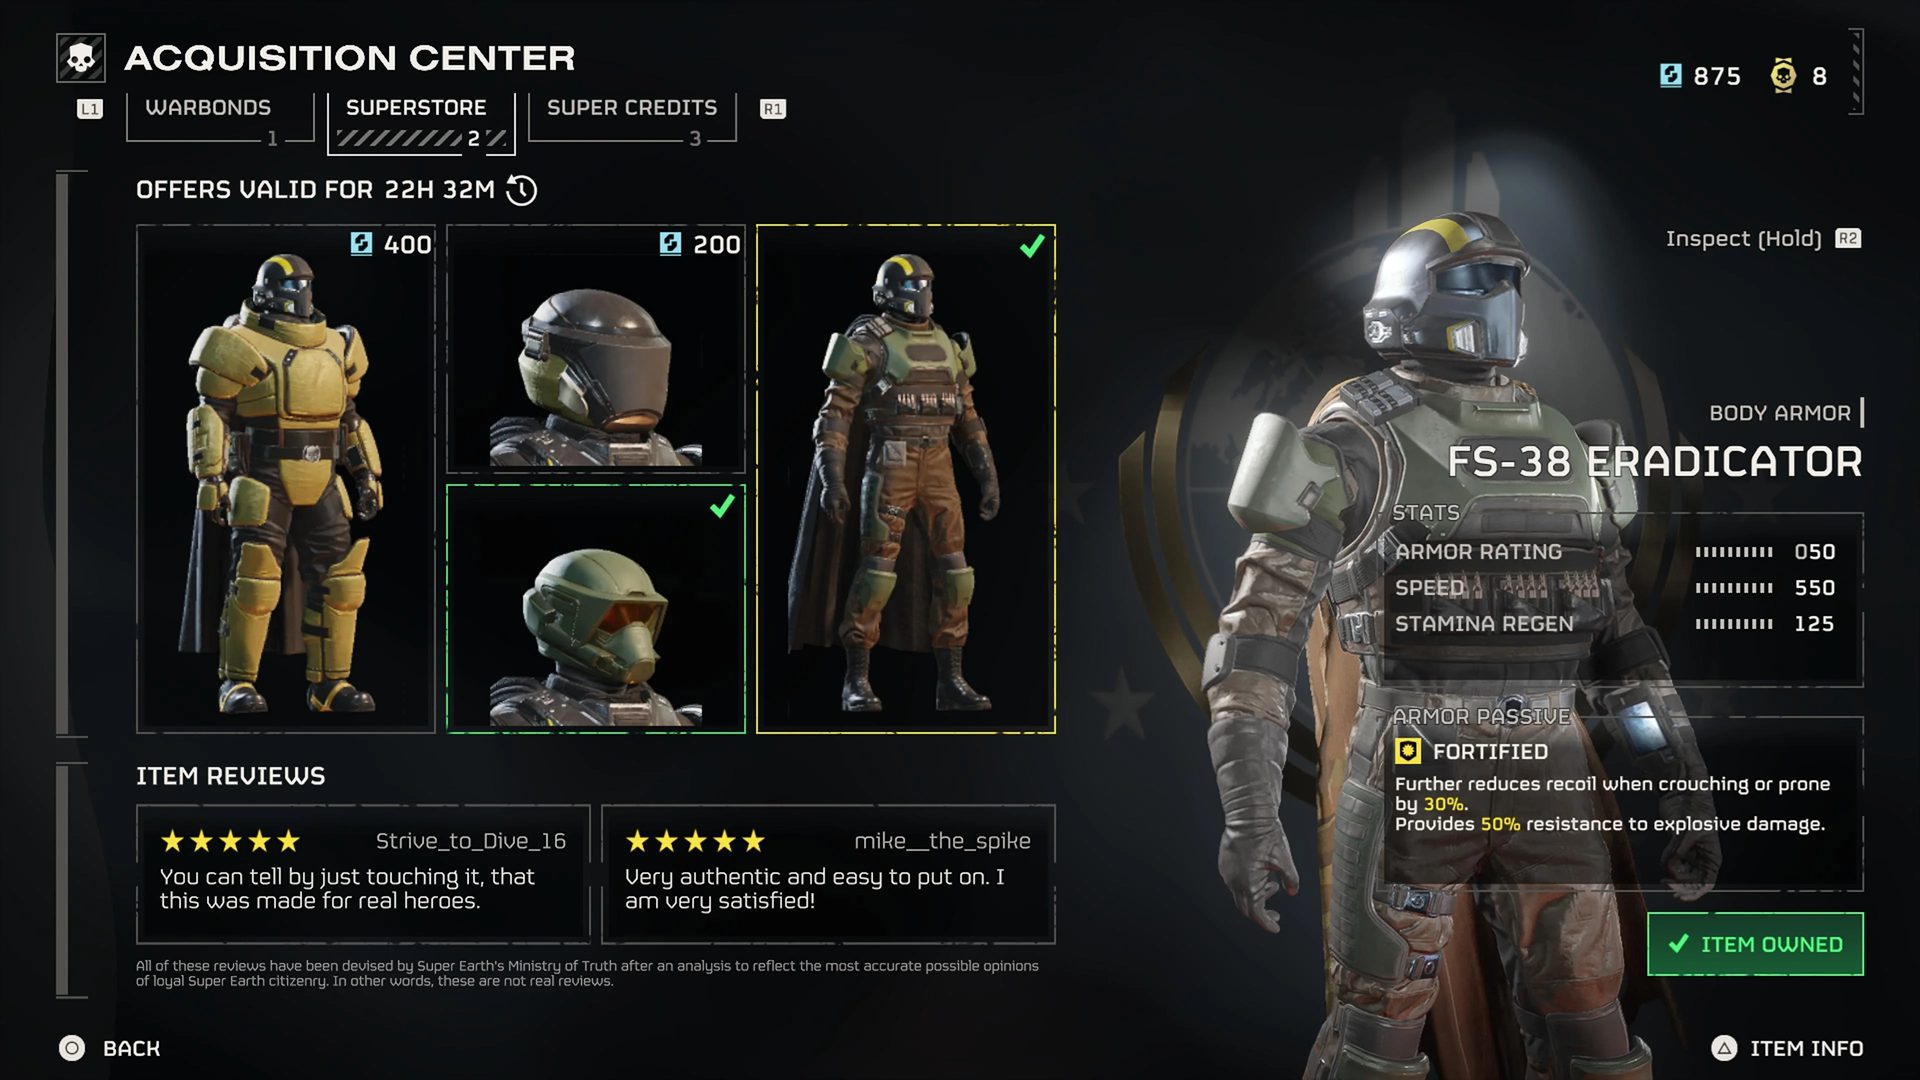
Table of Contents
Tier Breakdown
S-Tier – Universally Strong
-
Med-Kit: Holds +2 stims, increases stim duration. Vital for everyone—simple, powerful, and life-saving.
-
Engineering Kit: +2 grenades and reduced recoil while crouched. Great for close-quarters combat and crowd handling.
A-Tier – Strong but Situational
-
Democracy Protects: 50% chance to survive lethal damage and protect against bleeding. A great safety net for high-risk roles.
-
Fortified: Boosts explosive resistance and reduces recoil when crouched—very handy against bomb-heavy enemies.
B-Tier – Specialized Utility
-
Scout: Radar pings from placed markers and reduces detection range—great for stealth or solo play.
-
Servo-Assisted: Extends grenade throw range and grants more limb health—useful when working drones or engaging ranged support.
-
Peak Physique: Faster weapon recovery and melee boost. Helpful for handling heavy weapons or melee builds.
C-Tier – Niche or Underwhelming
-
Extra Padding: Slightly higher armor but offers little compared to more impactful passives.
-
Integrated Explosives: Auto-explodes upon death and gives extra throwables—interesting but not groundbreaking.
D-Tier – Mostly Flavor or Low Impact
-
Unflinching: Reduces flinch delay. Fun, but rarely game-changing.
-
Advanced Filtration: Reduces gas damage. Works in very niche builds only.
Summary Table
| Tier | Best For |
|---|---|
| S | Core survivability & utility (stims, grenades) |
| A | Prevention of death & recoil control |
| B | Stealth, throw range, or melee-focused setups |
| C | Default armor durability |
| D | Rare gimmicks or flavor playstyles |
Player Insight Highlights
One experienced player emphasizes that Scout armor can act as “S-Tier for stealth runs,” because its reduced detectability allows you to bypass enemies entirely and control engagements solo. Another notes Peak Physique makes heavy weapons feel far more responsive—especially LMGs—thanks to faster mechanical recovery even when recoil isn’t necessarily lower.
GladiatorBoost Spotlight
Need help testing which passive works best for your build—or farming for a specific armor? GladiatorBoost’s Helldivers 2 Boosting services can help you secure the perfect passive and practice loadouts until they’re second nature.
Conclusion
For pure performance and safety, prioritize Med-Kit, Engineering Kit, or Democracy Protects depending on your role. Build around Fortified or Servo-Assisted if you lean into explosive, support, or throw-heavy play. Go for Scout or Peak Physique if your focus is stealth or heavy-weapons mobility. Everything else can wait until you’re experimenting for fun or niche challenge runs.
Related Guides
Best Farming Pals in Palworld 1.0: The Ultimate Guide to Base Automation

Shikisai-no-Oka in Forza Horizon 6: Complete Location Guide
Forza Horizon 6 Nangan Treasure Hunt Guide: Rocket Ship Treasure Chest Location
Assassin's Creed Black Flag Resynced Blow the Man Down Trophy Guide