


Hollow Knight Silksong: Complete Tool List & Locations (All 65 Tools Explained)

Table of Contents
- 1 ⚔️ White Tools – Silk-Fueled Combat Abilities
- 2 🩸 Red Tools – Consumable Offensive Equipment
- 3 ⚙️ Blue Tools – Utility, Recovery, and Crafting Enhancements
- 4 🌿 Yellow Tools – Passive Buffs and Exploration Items
- 4.1 27. Druid’s Eye / Druid’s Eyes
- 4.2 28. Magma Bell
- 4.3 29. Warding Bell
- 4.4 30. Pollip Pouch
- 4.5 31. Fractured Mask
- 4.6 32. Multibinder
- 4.7 33. Weavelight
- 4.8 34. Sawtooth Circlet
- 4.9 35. Injector Band
- 4.10 36. Spool Extender
- 4.11 37. Reserve Bind
- 4.12 38. Claw Mirror / Claw Mirrors
- 4.13 39. Memory Crystal
- 4.14 40. Snitch Pick
- 4.15 41. Volt Filament
- 4.16 42. Quick Sling
- 4.17 43. Wreath of Purity
- 4.18 44. Longclaw
- 4.19 45. Wispfire Lantern
- 4.20 46. Egg of Flealia
- 4.21 47. Pin Badge
- 4.22 48. Compass
- 4.23 49. Shard Pendant
- 4.24 50. Magnetite Brooch
- 4.25 51. Weighted Belt
- 4.26 52. Barbed Bracelet
- 4.27 53. Dead Bug’s Purse
- 4.28 54. Shell Satchel
- 4.29 55. Magnetite Dice
- 4.30 56. Scuttlebrace
- 4.31 57. Ascendant’s Grip
- 4.32 58. Spider Strings
- 4.33 59. Silkspeed Anklets
- 4.34 60. Thief’s Mark
- 5 Enhance Your Silksong Experience with GladiatorBoost
Introduction

Hollow Knight: Silksong takes exploration and combat depth to new heights with a vast selection of 65 tools spread across Pharloom. These tools are Hornet’s key to survival — ranging from deadly weapons to traversal gear and passive relics that empower every aspect of gameplay.
They are divided into four main types:
-
White Tools: Silk-powered active abilities.
-
Red Tools: Attack-based tools consuming limited resources.
-
Blue Tools: Defensive or recovery-based items.
-
Yellow Tools: Passive and exploration-enhancing relics.
Finding all tools requires sharp observation, boss victories, and side quest completions. Below is a complete guide to every known Silksong tool and where to locate them.
⚔️ White Tools – Silk-Fueled Combat Abilities
1. Silkspear
Location: Mosshome, Moss Grotto
Unlocked by binding the statue in Mosshome. A mid-range thrust attack that excels in precise combat.
2. Thread Storm
Location: Craw Lake, Greymoor
Found by binding the Craw Lake statue. Creates a spinning silk storm that hits all nearby enemies.
3. Cross Stitch
Location: Exhaust Organ, Bilewater
Earned by defeating the Phantom boss. Fires multiple needles that chain between enemies.
4. Sharpdart
Location: Weavenest Karn, west of the Wormways
A fast, piercing projectile ideal for ranged damage.
5. Rune Rage
Location: The Slab
Reward for beating the First Sinner boss. Temporarily boosts attack and speed using Silk.
6. Pale Nails
Location: The Cradle (Act 3)
Obtained by binding Grand Mother Silk’s arm. Dramatically boosts Hornet’s melee power.
🩸 Red Tools – Consumable Offensive Equipment
7. Straight Pin
Location: The Marrow (above Grindle’s cell)
A simple thrown projectile for early-game ranged damage.
8. Threefold Pin
Location: Secret cave above Craw Lake, Greymoor
Fires three pins in a spread formation — ideal for crowd fights.
9. Sting Shard
Location: Deep Docks (crafted by Forge Daughter)
Requires 1 Craftmetal + 140 Rosaries. Enhances piercing damage.
10. Tacks
Location: Sinner’s Road
Reward for completing the “Roach Guts” Wish for Crull and Benjin. Works like caltrops that damage enemies walking over them.
11. Longpin
Location: Shellwood
Found behind the pink wasp nest. Extends thrown weapon distance.
12. Curveclaw
Location: Hunter’s March
Purchased from Mottled Skarr for 140 Rosaries. Arcing throw attack.
13. Curvesickle
Location: Far Fields Bellway
Unlocked after completing the Curveclaw throw challenge and returning post-rest. A boomerang-like weapon.
14. Throwing Ring
Location: Bilewater (Trail’s End Wish)
Obtained after completing “Trail’s End.” A returning ring that slices through enemies.
15. Pimpillo
Location: Greymoor
Crafted above Yarnaby’s bellhome using 1 Craftmetal. Boosts melee damage speed.
16. Conchcutter
Location: Sands of Karak
Hidden in Coral Tower cave. Executes spinning slash combos.
⚙️ Blue Tools – Utility, Recovery, and Crafting Enhancements
17. Silkshot I–III
Locations:
-
I: Take Ruined Tool to Forge Daughter (Deep Docks).
-
II: Take Ruined Tool to Twelfth Architect (Underworks).
-
III: Take Ruined Tool to Mount Fay table.
Each upgrade improves Silk projectile potency and range.
18. Delver’s Drill
Location: Underworks
Found on a southwestern table. Drills through fragile walls, unlocking secret paths.
19. Cogwork Wheel
Location: Underworks
Crafted by Twelfth Architect (1 Craftmetal + 360 Rosaries). Adds rotational knockback defense.
20. Cogfly
Location: High Falls
Crafted using 1 Craftmetal. Deploys an automated spinning companion.
21. Rosary Cannon
Location: High Halls Forum
A powerful ranged relic that fires bursts of Rosaries as projectiles.
22. Voltvessels
Location: Memorium (Act 3)
Found in the northeast. Electrifies Hornet’s strikes temporarily.
23. Flintslate
Location: Deep Docks
Found on a table. Enhances crafting speed and efficiency.
24. Snare Setter
Location: Weavenest Atla
Above the local bench. Lays silk traps that ensnare enemies.
25. Flea Brew
Location: The Marrow
Reward from Fleamaster Mooshka after finding five fleas. Increases Silk regeneration rate.
26. Plasmium Phial & Needle Phial
Location: Wormways (Alchemist Zylotol Quest)
-
Needle Phial: Quest start item.
-
Plasmium Phial: Quest completion reward.
Used to amplify healing and alchemical effects.
🌿 Yellow Tools – Passive Buffs and Exploration Items
27. Druid’s Eye / Druid’s Eyes
Location: Moss Home
Reward from Moss Druid’s “Berry Picking” and full Mossberry collection (Act 3). Boosts item discovery and Silk efficiency.
28. Magma Bell
Location: Deep Docks
Crafted by Forge Daughter (1 Craftmetal + 110 Rosaries). Creates shockwaves upon impact.
29. Warding Bell
Location: Far Fields
Found on a raised platform. Repels smaller enemies nearby.
30. Pollip Pouch
Location: Shellwood
Reward from Greyroot’s “Rite of the Pollip.” Expands inventory.
31. Fractured Mask
Location: Hunter’s March
Buy from Mottled Skarr for 260 Rosaries. Reduces damage taken once per life.
32. Multibinder
Location: Bellheart
Buy from Frey for 880 Rosaries after “My Missing Courier.” Boosts bind efficiency.
33. Weavelight
Location: Weavenest Atla
Reward from Moss Mothers boss. Summons a glowing silk companion.
34. Sawtooth Circlet
Location: Underworks
Crafted by Twelfth Architect (1 Craftmetal + 230 Rosaries). Adds bleed effects to melee hits.
35. Injector Band
Location: Whiteward
Found on a table. Increases healing speed.
36. Spool Extender
Location: Songclave
Buy from Jubilana for 720 Rosaries after “Wandering Merchant.” Extends maximum Silk storage.
37. Reserve Bind
Location: The Forum
Reward for defeating Second Sentinel boss. Stores excess Silk in reserve.
38. Claw Mirror / Claw Mirrors
Location: Whispering Vaults
Reward for defeating Trobbio and Tormented Trobbio (Act 3). Reflects incoming projectiles.
39. Memory Crystal
Location: Mount Fay
Hidden behind ice. Enhances map visibility.
40. Snitch Pick
Location: Blasted Steps
Purchased from Grindle for 740 Rosaries. Improves Rosary collection from corpses.
41. Volt Filament
Location: Voltnest, Sands of Karak
Reward for defeating Voltvyrm. Electrifies melee attacks.
42. Quick Sling
Location: Bilewater
Found by breaking a false ceiling. Decreases ranged weapon charge time.
43. Wreath of Purity
Location: Putrified Ducts
Grants immunity to poison and corruption effects.
44. Longclaw
Location: Putrified Ducts
Reward for completing “Broodfeast” Wish. Greatly increases melee range.
45. Wispfire Lantern
Location: Bellheart (west of Wisp Thicket)
Obtained after defeating Father of the Flame boss. Illuminates dark areas and deals burn damage.
46. Egg of Flealia
Location: The Marrow
Reward for completing “Lost Fleas” quest. Improves Silk regeneration.
47. Pin Badge
Location: Mount Fay
Reward for defeating Pinstress (Act 3). Displays quest markers on map.
48. Compass
Location: Purchased from Shakra for 70 Rosaries.
Displays player location on the map.
49. Shard Pendant
Location: The Marrow
Found on a table. Increases Rosary drop rates.
50. Magnetite Brooch
Location: Bonebottom
Buy from Pebb for 120 Rosaries. Attracts Rosaries and collectibles.
51. Weighted Belt
Location: Pilgrim’s Rest, Far Fields
Sold by Mort for 160 Rosaries. Improves Hornet’s control during falls.
52. Barbed Bracelet
Location: Sinner’s Road
Found on a corpse. Reflects minor damage to attackers.
53. Dead Bug’s Purse
Location: Wormways
Looted from a corpse. Increases Rosary gain from slain foes.
54. Shell Satchel
Location: Wormways (Steel Soul Mode)
Exclusive Steel Soul reward. Boosts healing capacity.
55. Magnetite Dice
Location: Dice mini-game with Lumble the Lucky
Earned through repeat victories. Increases luck-based drop rates.
56. Scuttlebrace
Location: Underworks
Crafted by Twelfth Architect (1 Craftmetal + 140 Rosaries). Boosts defense under low health.
57. Ascendant’s Grip
Location: Songclave
Purchased from Jubilana for 350 Rosaries after “Wandering Merchant.” Reduces fall damage.
58. Spider Strings
Location: Songclave
Buy from Jubilana for 320 Rosaries after “Lost Merchant.” Increases movement speed while airborne.
59. Silkspeed Anklets
Location: Weavenest Cindril, Far Fields
Earned by sprinting across a silk-lined chamber. Boosts sprint speed.
60. Thief’s Mark
Location: Blasted Steps
Purchased from Grindle for 350 Rosaries. Reduces Rosary loss on death.
Enhance Your Silksong Experience with GladiatorBoost
Exploring Pharloom’s secrets takes dedication—but if you’d like to jump straight into a fully equipped adventure, GladiatorBoost’s Hollow Knight Silksong Modded Accounts are the perfect shortcut. These accounts come with all major tools unlocked, upgraded resources, and story progression, letting you experiment with builds and explore every biome freely. Whether you’re replaying Silksong for fun or testing advanced tool combos, GladiatorBoost helps you experience the full depth of the game instantly.
👉 Discover Hollow Knight Silksong Modded Accounts and begin your journey with every tool at your disposal.
Related Guides

Black Ops 7 Illicit Cargo Event Rewards Guide: Every Camo, Challenge & Unlock Explained
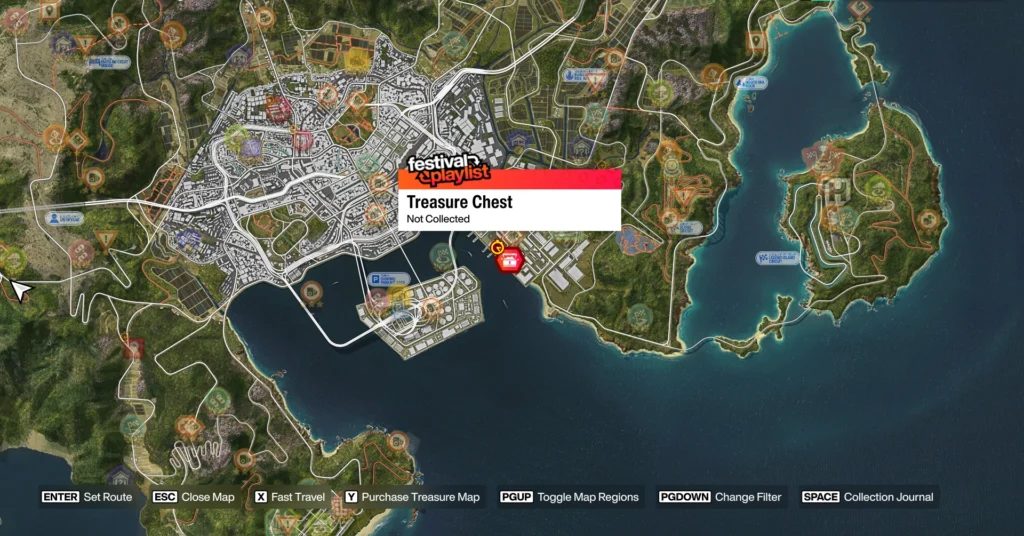
Forza Horizon 6 Treasure Hunt in Tokyo City Location (Spring) – Complete Guide

Forza Horizon 6 AstroToy Photo Challenge Guide: HZN-VI Rocket Location Explained
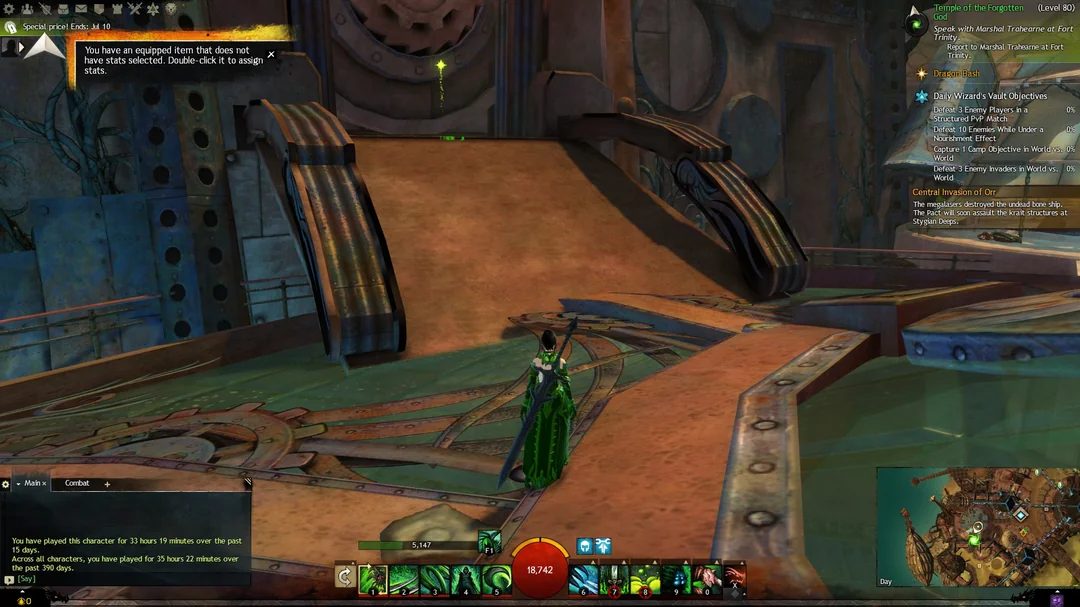
Guild Wars 2 Leveling Guide: The Fastest Ways to Reach Level 80