


Phasmophobia Tarot Cards Guide: Every Draw, Effect, and Risk Explained

Among the many dangerous tools ghost hunters can encounter in Phasmophobia, few are as unpredictable—or as thrilling—as the Tarot Cards. As one of the game’s seven Cursed Possessions, the Tarot Deck can dramatically change the course of a contract in seconds, either saving a team from disaster or ending a run instantly.
This guide explains how Tarot Cards work in Phasmophobia, what each card does, their draw chances, and how to decide whether the risk is worth the reward.
Table of Contents
What Are Tarot Cards in Phasmophobia?

Tarot Cards are a rare cursed item that can spawn on a contract instead of other cursed possessions like the Ouija Board or Voodoo Doll. When found, the deck contains 10 total draws, but not necessarily one of every possible card.
Each time a player interacts with the deck, one card is drawn at random. Once all 10 cards are used, the deck becomes inert. Because every draw can permanently affect sanity, hunts, or even player lives, Tarot Cards are considered one of the most high-risk mechanics in the game.
How Tarot Card Draws Work
Although there are 10 different Tarot Cards in Phasmophobia, each deck pulls from a probability pool rather than a guaranteed set. This means you might see multiple copies of the same card—or never draw some at all.
Important rules to keep in mind:
-
Card effects trigger immediately after the draw
-
Burn color reveals the card’s identity
-
Drawing during a hunt heavily alters outcomes
-
Some effects cannot be avoided once drawn
Understanding what each card does can help you decide when—or if—you should interact with the deck.
Every Tarot Card and What It Does
Below is a full breakdown of all Tarot Cards currently available, explained in plain terms so you know exactly what you’re risking.
The Tower (20% chance)
Burn Color: Blue
One of the most common cards, The Tower causes a surge of ghost activity for roughly 20 seconds. Interactions increase dramatically, which can help generate evidence but also raise the risk of hunts. This card is often used intentionally when players want faster confirmation of ghost behavior.
The Wheel of Fortune (20% chance)
Burn Color: Green or Red
This card has two possible outcomes:
-
Green burn: Gain 25% sanity
-
Red burn: Lose 25% sanity
It’s a gamble in every sense. Early-game pulls can be helpful, while late-game draws often push players closer to a hunt.
The Fool (17% chance, 100% during hunts)
Burn Color: Light Purple
The Fool is a trick card. It initially appears as another Tarot Card, but as it burns, it reveals itself and produces no effect.
Important note: if you draw Tarot Cards during a hunt, every pull will become The Fool. This makes the deck completely useless until the hunt ends.
The Devil (10% chance)
Burn Color: Pink
The Devil triggers a Ghost Event near the closest player. While it doesn’t directly start a hunt, it can drain sanity and create chaos—sometimes chaining into a hunt if conditions are right.
Death (10% chance)
Burn Color: Purple
Drawing Death immediately starts a cursed hunt, lasting longer than a standard hunt and ignoring normal sanity thresholds. This is one of the most dangerous cards in the deck and can easily wipe unprepared teams.
The Hermit (10% chance)
Burn Color: Light Blue
One of the most useful Tarot Cards. The Hermit forces the ghost back into its ghost room and locks it there for one minute. This can:
-
Confirm the ghost room
-
Stop roaming behavior
-
Make evidence gathering safer
However, it does not work during hunts or ghost events.
The Sun (5% chance)
Burn Color: Yellow
The Sun instantly restores the drawing player’s sanity to 100%. This is extremely valuable on higher difficulties where sanity drains quickly and hunts are frequent.
The Moon (5% chance)
Burn Color: White
The opposite of The Sun, The Moon drops the player’s sanity straight to 0%. This almost guarantees hunts and makes the affected player a prime target.
The High Priestess (2% chance)
Burn Color: Light Yellow
One of the strongest cards in the game. If a player is already dead, The High Priestess revives one of them at the spot they died. If no one is dead, the next player who dies will automatically be resurrected.
Think of it as a hidden extra life for the team.
The Hanged Man (1% chance)
Burn Color: None
The rarest and most feared Tarot Card. Drawing The Hanged Man kills the player instantly—no hunt required, no counterplay, no escape. Once drawn, death is guaranteed.
There is no way to prevent or mitigate this effect.
Are Tarot Cards Worth Using?
Tarot Cards are best viewed as a calculated risk. They can:
-
Accelerate evidence gathering
-
Restore or destroy sanity instantly
-
Trigger hunts on demand
-
Revive fallen teammates
However, they can just as easily sabotage a contract. Many experienced players save Tarot Cards for late-game use, while others draw early to maximize potential benefits before sanity becomes critical.
Progressing Faster
High-risk mechanics like Tarot Cards often appear in difficult contracts, weekly challenges, or Apocalypse modes. If you’re aiming to complete tough objectives, unlock achievements, or progress faster without repeated failures, Phasmophobia boosting can be a smart option.
With GladiatorBoost, experienced players can help you:
-
Complete high-difficulty contracts safely
-
Finish Apocalypse and challenge runs
-
Earn XP and progression without unnecessary wipes
-
Learn advanced strategies for cursed possessions like Tarot Cards
It’s an efficient way to experience endgame content while minimizing frustration and wasted runs.
Final Thoughts
Tarot Cards are one of Phasmophobia’s most exciting mechanics, blending chance, strategy, and pure horror into a single cursed item. Knowing what each card does—and when to draw—can be the difference between a clutch victory and an instant team wipe.
If you enjoy unpredictable gameplay and high stakes, Tarot Cards are worth the risk. Just remember: once you draw, fate decides the rest.
Related Guides

Black Ops 7 Illicit Cargo Event Rewards Guide: Every Camo, Challenge & Unlock Explained
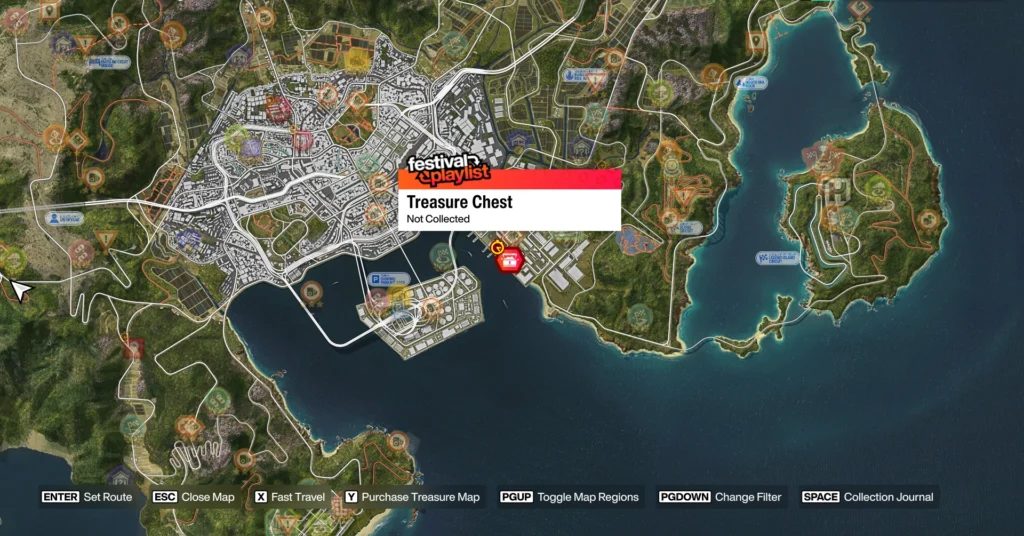
Forza Horizon 6 Treasure Hunt in Tokyo City Location (Spring) – Complete Guide
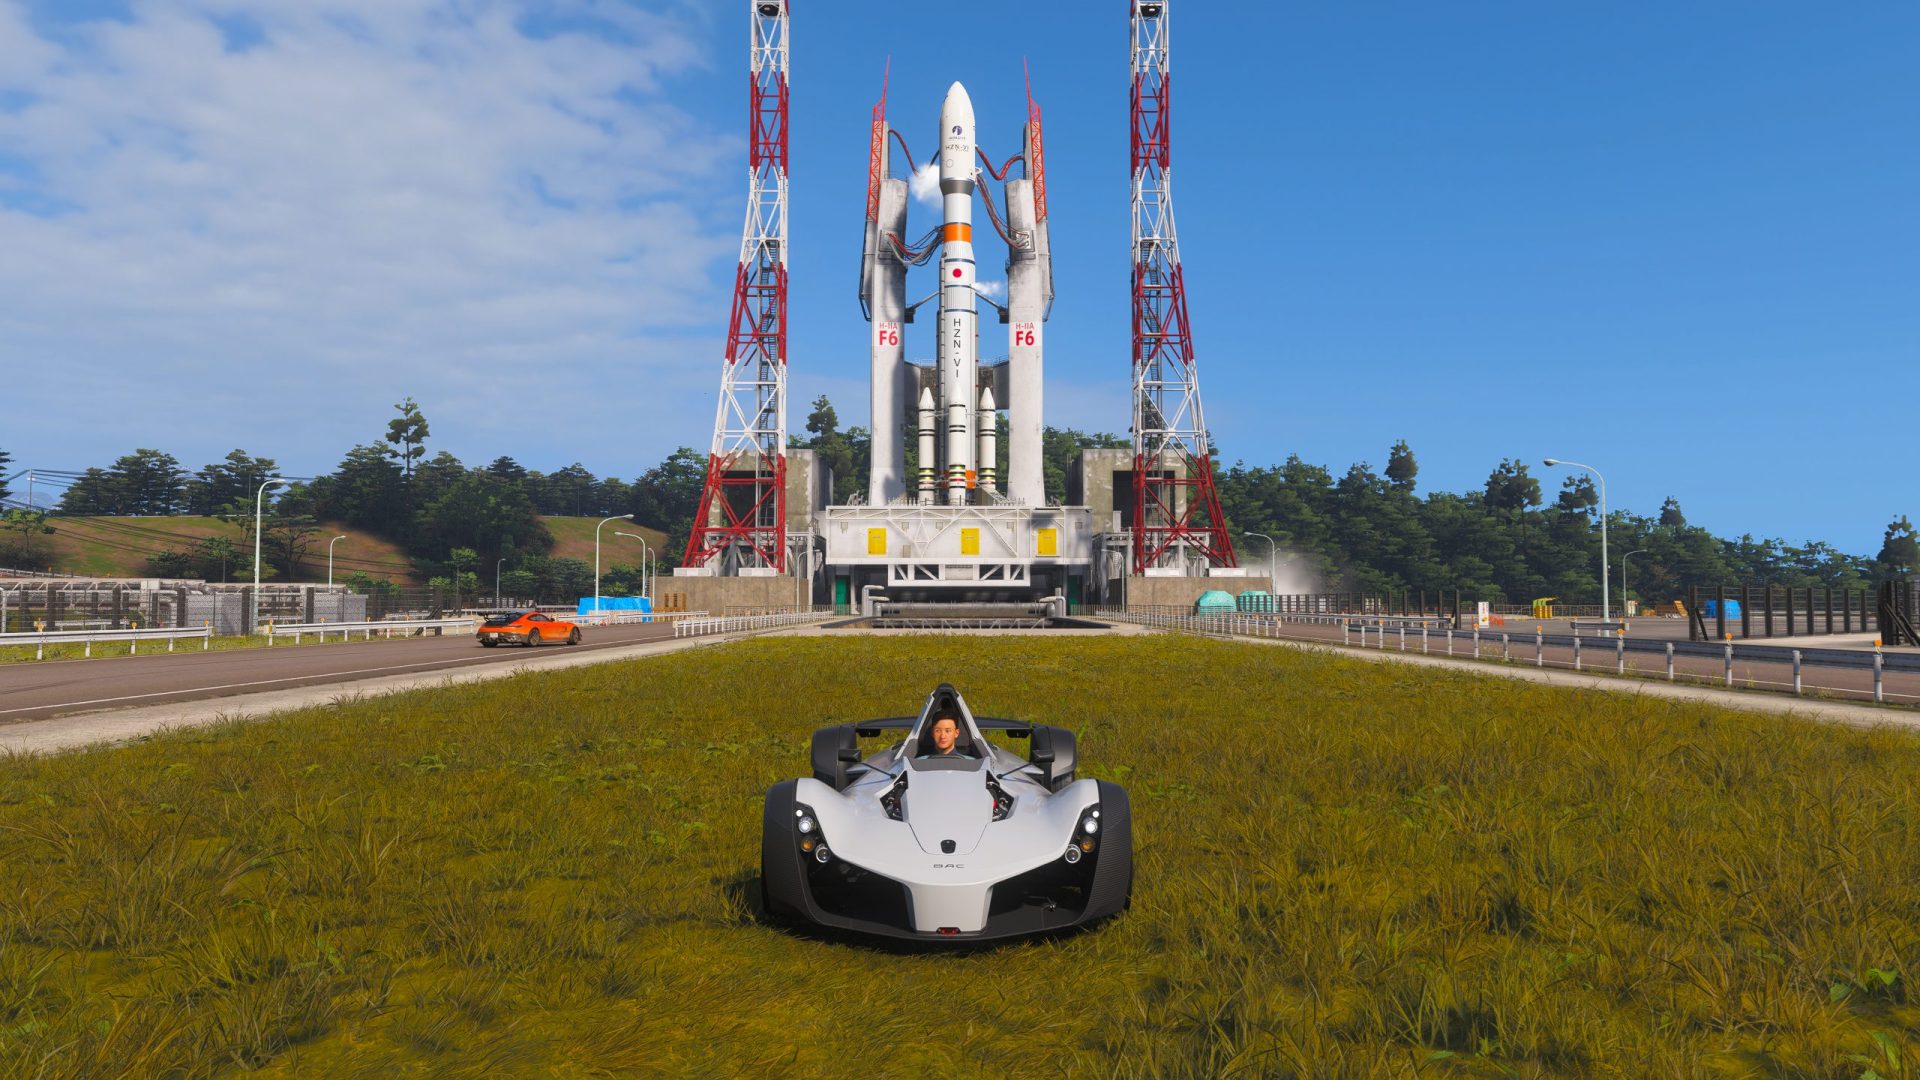
Forza Horizon 6 AstroToy Photo Challenge Guide: HZN-VI Rocket Location Explained
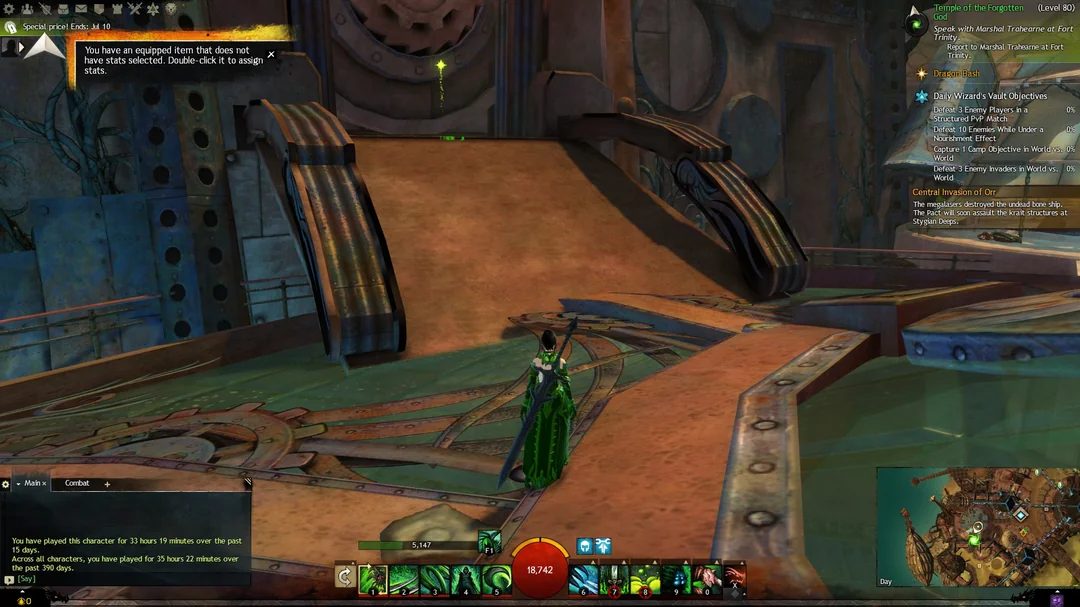
Guild Wars 2 Leveling Guide: The Fastest Ways to Reach Level 80