


Table of Contents
S+ Tier – Top Meta Units

These units are the game’s most powerful, offering exceptional damage, utility, or both:
-
Blueberries – A reliable offensive unit with balanced damage and efficiency.
-
Beehive – Summons helper bees with unlimited range; excels in crowd control.
-
Bloodvine – Exceptional AoE damage and high attack rate; ideal for late-game dominance.
-
Icebuds, Petalray, Electric Beetroot, Mango Cluster, Hellroot, Big Mushroom – All deliver massive area damage or powerful effects to pulverize overwhelming waves.
-
Rafflesia, Lucky Clover, Electroleaf, Juggercorn, Blossom Barrage, Rosebeam – Offer unique high-impact utility, damage, or support scaling.
S Tier – Exceptional Carry Units
These towers reinforce your lineup with strong offensive or supportive value:
-
Golem – Unmatched single-target power; vital against tough boss-like threats.
-
Venus Flytrap – Devastating AoE damage; great at choke points.
-
Corn, Grapes – Strong, accessible towers with solid range and DPS.
-
Additional powerhouses include Laser Plant, Pyropetal, Speed Sprinkler, Atomic Pepper, Doompetal, Stun Flower, Farmer, Lucky Clover, Gold Golem, Beehive (cross-listed for consistency), Bubble Plant, Atomic Pepper, and more.
A Tier – Strong, Reliable Picks
Great choices if you don’t yet have access to the top tiers:
-
Laser Plant, Broccoli, Sunflower, Strawberry – Solid mid-game damage and utility.
-
Others like Lemon Tree, Peas in a Pod, Money Tree, Drone, Repair Worker, and Walnut balance crowd control and economy.
B Tier – Decent Early Picks
Affordable and useful in early waves, but eventually outclassed:
-
Potato, Ghost Pepper, Sunflower, Pumpkin, Watermelon, Palm Tree, Money Tree (for economy), Kiwi Cannon, Gnome, Fruit Molotov, and Drone provide niche value but fall short at higher wave demands.
C–D Tier – Avoid if Possible
These units are mostly placeholders or weak even in early-game:
-
Common early spawn options like Tomato, Strawberry, Potato, Rose Trap, Mushroom, Onion, Cactus, Eggplant, Bamboo, etc.—use sparingly and swap quickly for better alternatives.
Tier Summary Table
| Tier | Examples | Why It Matters |
|---|---|---|
| S+ | Bloodvine, Beehive, Hellroot, Blueberries | High AoE/offense and support versatility |
| S | Golem, Venus Flytrap, Corn, Grapes | Strong solo performance and utility |
| A | Laser Plant, Peas in a Pod, Lemon Tree | Reliable mid-game options |
| B | Potato, Ghost Pepper, Money Tree | Early support but limited late-game use |
| C–D | Tomato, Rose Trap, Onion, etc. | Minimal impact—use cautiously |
GladiatorBoost Spotlight
Want to build a meta-proof squad with top-tier towers without the grind? GladiatorBoost’s Roblox Boosting Services can help optimize your unit rotations, seed investments, and tower placement—ensuring you dominate every wave with ease.
Related Guides

Black Ops 7 Illicit Cargo Event Rewards Guide: Every Camo, Challenge & Unlock Explained

Forza Horizon 6 Treasure Hunt in Tokyo City Location (Spring) – Complete Guide
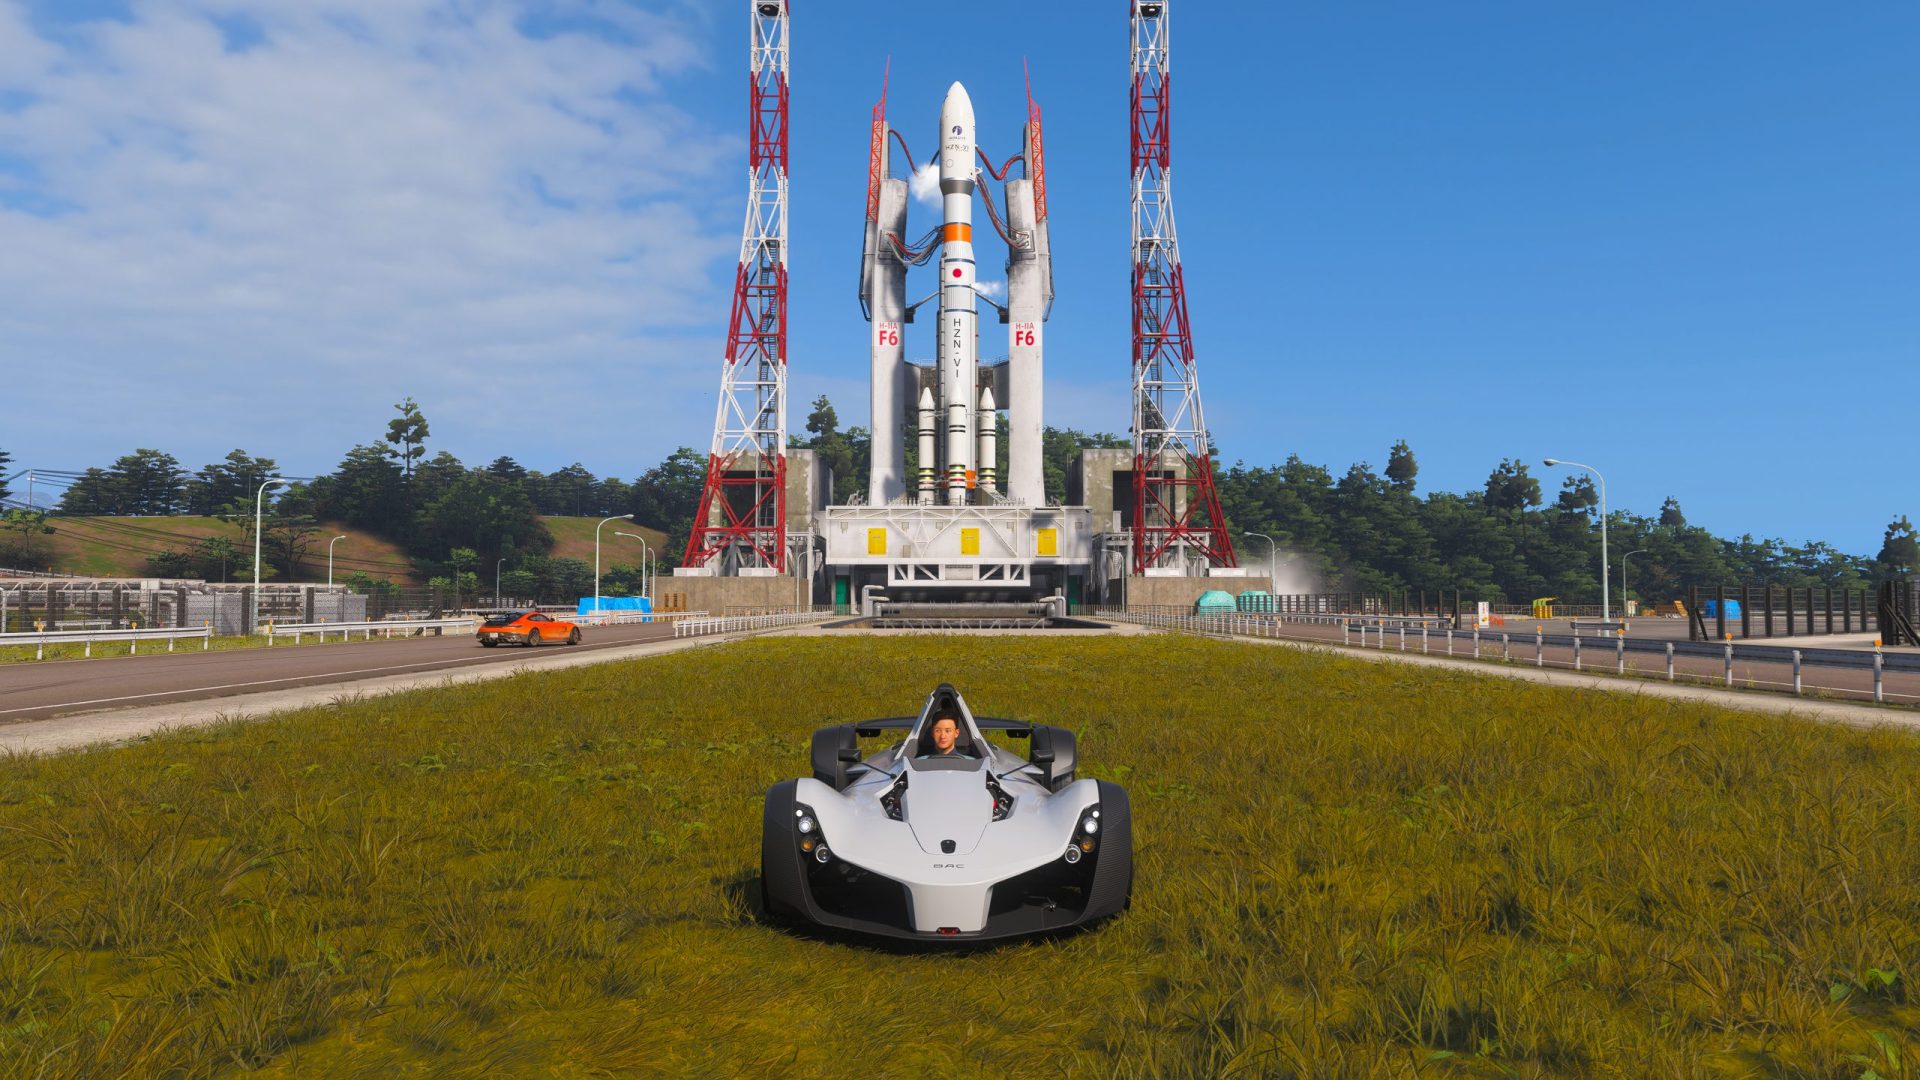
Forza Horizon 6 AstroToy Photo Challenge Guide: HZN-VI Rocket Location Explained

Guild Wars 2 Leveling Guide: The Fastest Ways to Reach Level 80