


Table of Contents
- 1 How to Get Bronze in Runescape: Dragonwilds – Beginner’s Crafting Guide
- 1.1 Step 1: Unlock Your Crafting Infrastructure
- 1.2 Step 2: Mining Copper and Tin
- 1.3 Step 3: Set Up a Remote Base or Teleportation
- 1.4 Step 4: Smelt Bronze
- 1.5 Step 5: Crafting Bronze Equipment
- 1.6 Resource Optimization Tips
- 1.7 Want Faster Progress? Try GladiatorBoost’s Runescape Dragonwilds Boosting
- 1.8 Final Thoughts
How to Get Bronze in Runescape: Dragonwilds – Beginner’s Crafting Guide
If you’re stepping into the world of Runescape: Dragonwilds, crafting your first set of metal tools and armor is a major early-game milestone. Bronze is the first usable metal in your crafting journey, and it opens the door to better tools, stronger weapons, and tougher armor — essential for surviving and progressing through Ashenfall.
Unlike standard versions of Runescape, Dragonwilds introduces unique mechanics for resource gathering and crafting, making Bronze a little more involved to acquire than in the base game. This guide covers everything you need to know: from setting up crafting stations to mining the right ores and avoiding early-game threats.
Step 1: Unlock Your Crafting Infrastructure
Before you can smelt Bronze, you’ll need to unlock and place two critical stations:
-
Kiln – Used for processing clay and other base materials.
-
Furnace – Required to combine ores into Bronze bars.
To unlock the Kiln, collect Clay from the swamp biomes (usually found near your starting area). After that, you’ll need to collect Coal and Fire Runes to craft and activate the Furnace. Both the Kiln and Furnace must be placed outdoors, so ensure your base layout supports external placement without structural instability.
If you haven’t started your base yet, now’s a good time to secure a flat area with enough room to expand your crafting stations.
Step 2: Mining Copper and Tin
Once your Furnace is active, you’re ready to gather the ingredients for Bronze:
-
Copper Ore
-
Tin Ore
Both resources can be found in the Fractured Plains, located around 700 meters north of Bramblemead Valley. You’ll want to follow the western riverbank, where ore nodes cluster around cliff walls and rocky ridges.
🛠 Tool Required: You must use a Bone Pickaxe to mine these ores. Other tools like Rocksplosion won’t work unless the Bone Pickaxe is also in your inventory.
Be cautious — the Fractured Plains are home to Level 3 monsters, which can quickly overwhelm unprepared adventurers. Bring combat spells, buffs, and a solid escape plan.
Step 3: Set Up a Remote Base or Teleportation
Mining trips to the Fractured Plains can get tedious if you’re running back and forth. Consider setting up a temporary shelter near the ore nodes. Here are two strong options:
-
Build a small house with a bed to set a spawn point.
-
Use Lodestones paired with Law Runes to teleport between your main base and the mining area.
This approach saves you time and helps avoid repeat runs through monster-infested terrain. It also gives you breathing room if you’re overwhelmed during resource collection.
While you’re gathering Copper and Tin, don’t forget to hunt Sheep nearby. They drop Fleece, which you’ll need to spin into Wool Threads — a vital component in most early-game Bronze gear.
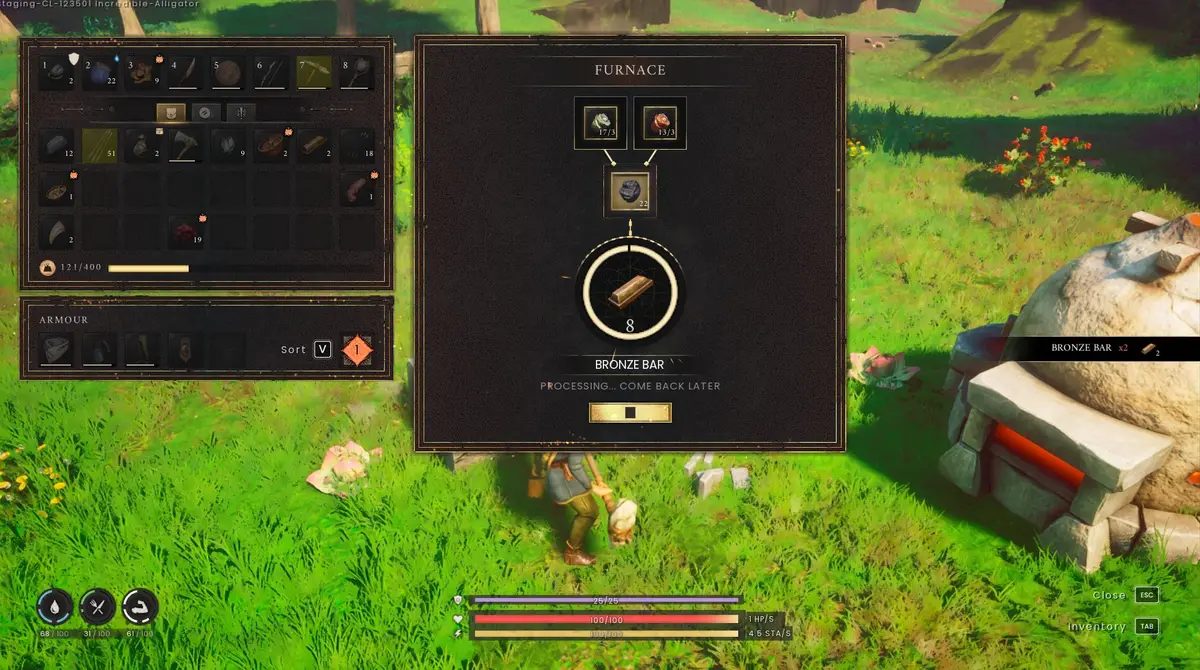
Step 4: Smelt Bronze
Once you’ve returned home with Copper and Tin, head to your Furnace:
-
Place Copper and Tin Ore into the two input slots.
-
Add Coal as fuel.
-
Wait for the Furnace to process the materials into Bronze Bars. You can sleep in a nearby bed to pass the time quickly.
⏳ Ore nodes in the Fractured Plains take a few minutes to respawn. Bring plenty of inventory space so you can maximize each trip.
Step 5: Crafting Bronze Equipment
To turn your Bronze bars into functional tools or gear, you’ll need to build a Smithing Forge. This station allows you to create everything from Bronze Greatswords to basic armor pieces. Ensure your inventory includes:
-
Bronze Bars
-
Wool Threads (from processed Fleece)
-
Optional: Additional materials depending on the specific item
Start with weapons or pickaxes to improve your resource collection capabilities, then move on to armor for survivability.
Resource Optimization Tips
-
Use Vault Cores early: These allow you to store large amounts of ores and materials near your crafting stations, reducing your inventory burden.
-
Plan long trips: Since ore nodes respawn slowly, it’s best to make each trip worthwhile. Carry a full load back before returning.
-
Avoid combat when possible: Runescape: Dragonwilds allows for strategic disengagement. If you’re being chased by enemies, just keep moving — they’ll eventually lose interest.
Want Faster Progress? Try GladiatorBoost’s Runescape Dragonwilds Boosting
Crafting your first Bronze set is exciting, but it can be time-consuming — especially with dangerous enemies and slow respawn timers. If you’re short on time or want a smoother experience, GladiatorBoost offers premium Runescape Dragonwilds Boosting services tailored to your needs. From material gathering to gear crafting, our expert boosters can help you skip the grind and jump straight into higher-level content.
👉 Check out Runescape Dragonwilds Boosting at GladiatorBoost
Final Thoughts
Getting Bronze in Runescape: Dragonwilds is your first real step into mastering the crafting system. While it takes some effort — from unlocking stations to surviving the Fractured Plains — it’s also a rewarding and essential milestone for every player. Once you’ve equipped yourself with Bronze tools and armor, the rest of Ashenfall becomes much more manageable.
Plan your trips, prepare your stations, and always keep an eye on efficiency. With Bronze in hand, you’re ready to take on the next tier of adventures.
Related Guides

ARC Raiders Red Coral Jewelry Farming Guide: Best Locations and Fastest Loot Routes

Best Early Cars in Forza Horizon 6: Fastest Budget Unlocks for New Players

Forza Horizon 6 House Locations Guide: Every Home, Price, Perk, and Unlock Requirement

Black Ops 7 Zombies Wonder Weapons Ranked: The Ultimate Tier List