


Venture into the mechanical depths of Dun Morogh and prepare to face the terrors lurking within the prestigious, but now desolate Gnomeregan. Once the glowing capital of gnome innovation, this subterranean techno-city has been overrun by nefarious troggs, leading to its tragic irradiation. Braving this Level-Up Raid in World of Warcraft Classic: Season of Discovery is no small feat; it demands a coordinated team of 10 players, with a recommended composition that includes a steadfast tank, three vigorous DPS, and a meticulous healer, all at or above level 40.
Embark on this treacherous dungeon run with a heightened sense of anticipation, as not only do the mechanical monstrosities await but also the potential for potent rewards. Delve into the heart of the instance through two distinct pathways: the main entrance, which swiftly takes you near the clutches of Viscous Fallout, or the backdoor, reserved for those holding the Workshop Key or for Rogues with lockpicking dexterity, guiding you directly to the Engineering Labs. It is here, amidst the gears and steam, that you and your party may stumble upon an array of exclusive crafting recipes, weaving through the labyrinth to unearth the fabled treasures.
Perhaps the most electrifying of these discoveries is the “Spark of Inspiration,” a World Buff of immense power, bestowing upon its recipients enhanced critical strikes, spell potency, and swiftness, energizing adventurers for a whole 120 minutes. Such a gift is invaluable and one that cannot be found within the water-logged depths of Blackfathom Deeps, for it is the reward of the gnomish legacy. However, the particulars of Gnomeregan’s bounty, including loot that’s entirely unique to this raid, are meticulously catalogued within the Gnomeregan Loot Guide, a resource indispensable to any plunderer or hero-in-the-making. So gear up, for the clockwork corridors of Gnomeregan await those who dare to reclaim the gnome’s ancestral homeland and thwart Mekgineer Thermaplugg’s evil machinations.
Table of Contents
- 1 Preparation and Requirements
- 2 Navigating to Gnomeregan
- 3 Bosses Overview
- 4 Boss 1: Grubbis
- 5
- 6 Boss 2: Viscous Fallout
- 7 Boss 3: Electrocutioner 6000
- 8 Boss 4: Crowd Pummeler 9-60
- 9 Boss 5: Dark Iron Ambassador
- 10 Boss 6: Mekgineer Thermaplugg
- 11 Gnomeregan Raid Loot
- 12 Gnomeregan World Buff
- 13 FAQs
- 14 Conclusion
Preparation and Requirements
Before setting foot in the intricate maze of Gnomeregan, thorough preparation will serve as the cornerstone of your success. Adventurers aiming to conquer this raid should heed the following requirements and provisions:
Character Level: Ensure that all raid members are at least level 40 to stand a chance against the technological terrors that lurk within.
Essential Consumables:
Stockpile Greater Mana Potions for magic users to sustain their spell-casting endurance.
Have a robust supply of Superior Healing Potions on hand to mend wounds in the heat of battle.
Obtain the exclusive Alchemist-specific Potion, a concoction pivotal for mitigating the environmental hazards and mechanical monstrosities of Gnomeregan.
Raid Composition and Lockout:
Formulate a balanced group of 10 stalwart heroes, ideally structured with at least one tank, three damage dealers, and one healer.
Familiarize yourselves with the raid’s 3-day lockout period, necessitating strategic planning to maximize your efforts within this window.
Understanding the geography of Gnomeregan is crucial for Horde players seeking its treasures:
Navigate from Orgrimmar to the Engineering shop to converse with Sovik.
Voyage to Ratchet, then onwards to the scallywag-infested port of Booty Bay.
There, seek out Scooty and complete the quest “Gnomer-gooooone!” and its follow-up to secure the Goblin Transponder, your key to teleporting directly into the belly of Gnomeregan.
The raid itself stands as a gauntlet of challenges spread over unique vertical layers, embodying a descent into the gnome’s forsaken metropolis. With exclusive bosses like Grubbis, Crowd-Pummeler 9-60, and the notorious Mekgineer Thermaplugg, each member must be well-versed in updated battle tactics and mechanics. Loot-wise, Gnomeregan doesn’t disappoint – prospects can gear up with freshly-introduced items, including melee and ranged weaponry, adornments like rings and necklaces, and protective gear across all armor types – each piece tailored to various classes and playstyles.
As you strategize and stock up, anticipate the holistic utilization of this guide’s strategies with the assurance that you are amassing not only the physical arsenal but also the knowledge to navigate and conquer the volatile vault of Gnomeregan.

Embarking on the venture into Gnomeregan requires a firm grasp of the lay of the land. This storied dungeon lies tucked within the frosty embrace of Dun Morogh, to the west where ambitious gnomes and stout-hearted dwarves commence their journeys. Horde adventurers are advised to utilize the LFG tool for enlistment or access the Goblin-engineered portal in the scurvy pirate haven of Booty Bay, subject to completion of a preliminary quest chain, to transport themselves directly to Gnomeregan’s precipice.
Upon reaching Dun Morogh, follow these navigational beacons to ensure your party does not falter on the way to the instance:
Setting Off from Ironforge: For Alliance players, leave Ironforge through the main gate, hewing close to the paved paths that wend and weave through the snow-clad landscape.
Brenwall Village: Journey to the northwest edge of this settlement, with its smoke-ribboned chimneys, and seek the yawning cavernous entrance marked by the unmistakable iconography of gnome-kind.
Elevator Access: A marvel of gnome engineering, the entrance features an elevator system. Stay vigilant for its opportune descent, then pile into its metal maw to be lowered into the techno-city’s fracture.
For the Horde: Beyond Booty Bay’s teleportation method, it’s also possible for Horde members to trek across the continent and, hidden by the folds of Khaz Mountains, discover a secondary trogg-infested entrance to this prodigious dungeon.
Lastly, adventurers would do well to mentally map out the elaborate passageways of Gnomeregan—where it is all too easy to stray into a beset ambush of leprous minions, or set off the clamorous alarms of the sentries, each eager to complicate your raid with unwelcome reinforcements. As you thread your way deeper, bear in mind the ultimate goal: unseating the self-proclaimed Mekgineer Thermaplugg and commandeering his vault of gadgetry and gilt.
Bosses Overview
In the mechanical heart of the once-great Gnomeregan, adventurers face a gauntlet of six formidable bosses, each presenting a unique challenge demanding strategic finesse and combat acuity. The raid’s adversaries include:
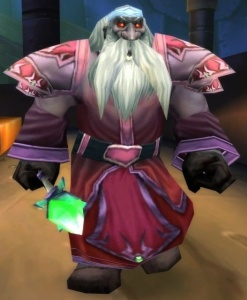
Grubbis: This mutated creature, accompanied by his faithful pet Chomper, strikes with rapid and devastating attacks. Cunning and force are required in equal measure to subdue this abomination.
Viscous Fallout: Known for dropping the coveted [Hydrocane], this mini-boss is shrouded in toxic waste, calling for exceptional endurance or the mastery of quick evasive action.
Electrocutioner 6000: This electrifying construct discharges potent blasts of electricity, requiring precise coordination to dismantle while wedging through its defensive overcharge.
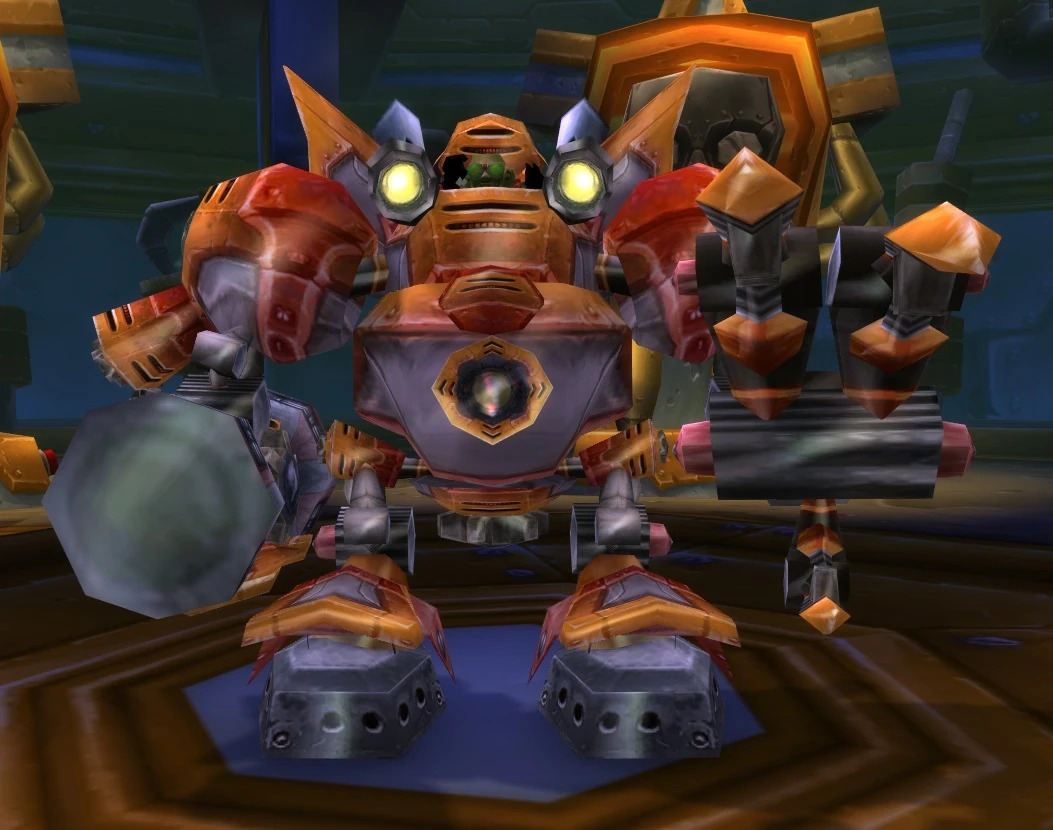
Crowd Pummeler 9-60: Wielding formidable kinetic attacks that can stun and disrupt, Crowd Pummeler demands that raiders approach with tactical positioning to mitigate its crowd control abilities.
Dark Iron Ambassador: A sinister envoy amongst the chaos, preying on the weak with debuffs and fiery destruction. Teams must balance offense and cleansing to thwart his diplomatic immunity.
Mekgineer Thermaplugg: The mastermind behind Gnomeregan’s fall, whose strategic genius is matched only by his sadistic arsenal of explosive contraptions and mechanical minions.
Each encounter within the raid has been meticulously designed to complement Gnomeregan’s theme of ingenuity gone awry:
Radiation-Themed Challenges: Radiating zones require careful maneuvering and situational awareness.
Mechanical Minions: Miniature automatons add layers of complexity, often necessitating split-second decisions and prioritization.
Environment Hazards: Navigate through traps and puzzles, a testament to gnomish design that now serves a more sinister purpose.
Residing within the steel-boned corridors of this mechanical maze are echoes of the gnomes’ past glory, now guarded by the darkened hearts of creatures twisted by radiation and betrayal. The showdowns in this raid are not merely battles of strength but of wits and resolve, reflecting the very essence of gnomish tenacity and innovation. As such, every strategy, every move within these boss encounters echoes the intricate dance of mastering an unpredictable and volatile clockwork chaos.
Boss 1: Grubbis
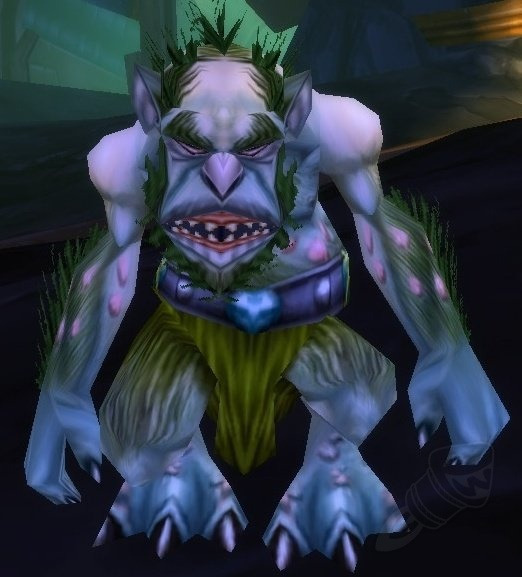
Tremors of anticipation ripple through your party as you approach the lair of Grubbis, Gnomeregan’s first formidable boss encounter. This elite Trogg, along with his relentless pet, Chomper, presents a quintessential “tank and spank” challenge that will test your group’s cohesiveness from the get-go. As the echoes of previous conflicts fade, and the mechanical whir of dormant tech fades into the background, it’s time to focus on the task at hand—defeating Grubbis.
Here’s how your party should engage this first guardian of gnome-made entropy:
Tank Duties: The tank must leap into action, seizing Grubbis’s attention with a thunderous barrage of blows designed to lock in high threat levels. Simultaneously, they should apply similar tactics to Chomper, ensuring both adversaries focus squarely on this bulwark of defense.
DPS Strategy:
Prioritize Chomper, directing a lethal volley of attacks to subdue this companion swiftly—lessening the pressure on your healer and tank.
Unleash a relentless assault on Grubbis, but be vigilant of your threat level. A careful dance of aggression and restraint is crucial to avoid drawing his ire from the tank.
Healing Focus:
Prepare to dispense a stream of restorative magic to keep your tank fortified against the Trogg’s brutal strikes.
Expand your awareness to the entire group by providing critical heals to any party members who unwittingly snatch Chomper’s or Grubbis’s attention.
Manipulate the battlefield to your advantage by utilizing stuns and fear effects, introducing a strategic respite that can provide essential breathing room for healers and allow DPS to orchestrate a symphony of devastation without reprisal. However, be aware that Grubbis makes his entrance only after his Trogg minions have been dispatched; this prerequisite must be accomplished to ensure his appearance.
The demise of Grubbis signals more than just victory; it is a necessity, a metaphorical key that unlocks the path to subsequent encounters. But venture not carelessly post-victory—the cavernous domain of Gnomeregan is prone to sudden cave-ins, especially near the entrance. A swift exodus post-fight is advisable, lest you find yourselves encased in stone, far from the spoils that beckon ahead.
Successfully dismantling this Trogg tandem will leave your group standing on the precipice of Gnomeregan’s deeper challenges, with the knowledge that teamwork and tactical prowess can overcome the chaos of irradiated aberrations.
Boss 2: Viscous Fallout
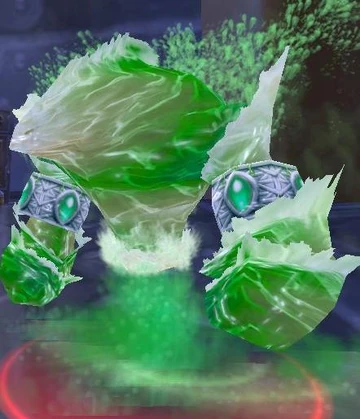
As your party ventures deeper into the industrial catacombs of Gnomeregan, the musty air tinged with ozone, you abruptly find yourselves on a battlefield cloaked in a shroud of radioactive mist. Meet Viscous Fallout, Gnomeregan’s second boss—a glowing, amorphous horror who requires a keen understanding of elemental resistances.
Engaging Viscous Fallout calls for a straightforward but effective approach. Here’s how your group should ready itself for this confrontation:
Tank Strategy: The tank should grab the aggro quickly, maintaining a steady stream of high-threat abilities to keep Viscous Fallout anchored and away from the other party members.
DPS Caution: Damage dealers must toggle their might, watching their threat levels to avoid upstaging the tank. More significantly, they should sideline frost-based attacks, as Viscous Fallout is utterly immune to this school of damage.
Healer’s Watch: Healers must hold a steady hand, primarily focusing their efforts on the tank. Still, they should also prepare for swift, spot heals on damage dealers who may inadvertently snatch the boss’s attention.
This encounter doesn’t present a complex dance of mechanics—instead, it allows each party member to draw upon their might and mastery of their class’s offensive toolkit. Here are the steps to ensure victory over this toxic adversary:
Maximize Damage Output: Without the complication of frost abilities, emphasize on a roster of the most potent spells and skills at your disposal.
Positioning: Keep a tight formation, minimizing movement to enhance damage output and ease the healer’s job, especially since Viscous Fallout doesn’t necessitate complex footwork.
Sustain and Recover: Utilize defensive cooldowns judiciously and keep health-restoring potions within reach to recover from any sudden spike in radioactive damage.
Slain under the might and coordination of your party, Viscous Fallout collapses into the very puddle of waste that birthed its form, yielding access to the next phase of Gnomeregan and closer to the prize — the “Electrocutioner 6000”. This mini-boss, like a living embodiment of Gnomeregan’s hazardous state, serves as a testament to the resilience and tenacity required to press on through the raid, with each member contributing their strength to the collective end. With strategy and force combined, the journey through Gnomeregan’s perilous depths continues.
Boss 3: Electrocutioner 6000
As your party ascends the metallic ramps within the Launch Bay, you encounter the charged atmosphere signaling the presence of Electrocutioner 6000. This formidable construct patrols a raised platform, and its defeat is a crucial step in your raid’s progression, as it possesses the Workshop Key that grants access to further depths of Gnomeregan. The key is a token of victory, an item nodding to the team’s evolving mastery over the dungeon’s mechanical menaces. Approaching this encounter, it’s imperative to strategize with both precision and caution.
To dismantle Electrocutioner 6000, adhere to these tactical guidelines:
Melee fighters should maintain maximum melee range. This positioning minimizes the risk of Electrocutioner’s “Chain Bolt” jumping between party members, conserving group health and healer mana.
DPS Priorities:
All damage dealers, heighten your assault, aiming to swiftly overwhelm the boss. Due to the lack of complex tactics required to best this foe, a concentrated barrage of your most powerful abilities will suffice.
Spread out to avoid the electrical chain reaction of its potent “Chain Bolt,” ensuring that the surge does not incapacitate or heavily damage multiple raid members.
Healers, your task is twofold: remain vigilant in sustaining the tank, and prepare for a proactive wave of healing following the Electrocutioner’s “Chain Bolt” across the group. Your responsiveness here will be a determining factor in the raid’s ability to absorb the boss’s sporadic bursts of electrical damage.
Despite his daunting appearance, Electrocutioner 6000 does not necessitate intricate tactics; however, disregarding the aspects of this fight due to its perceived simplicity would be ill-advised. A coherent and well-executed strategy will see Electrocutioner 6000 dismantled with gears grinding to a halt, clearing the path to your next formidable challenge: Crowd Pummeler 9-60. Remember, while Electrocutioner may fall without much fanfare, his demise further emboldens the raid party, uniting you all in anticipation of the heightened complexities that await further along in the mercurial depths of Gnomeregan. As of the latest guide update in February 2024, these tactics continue to prove effective in disabling this electrically charged foe.
Boss 4: Crowd Pummeler 9-60
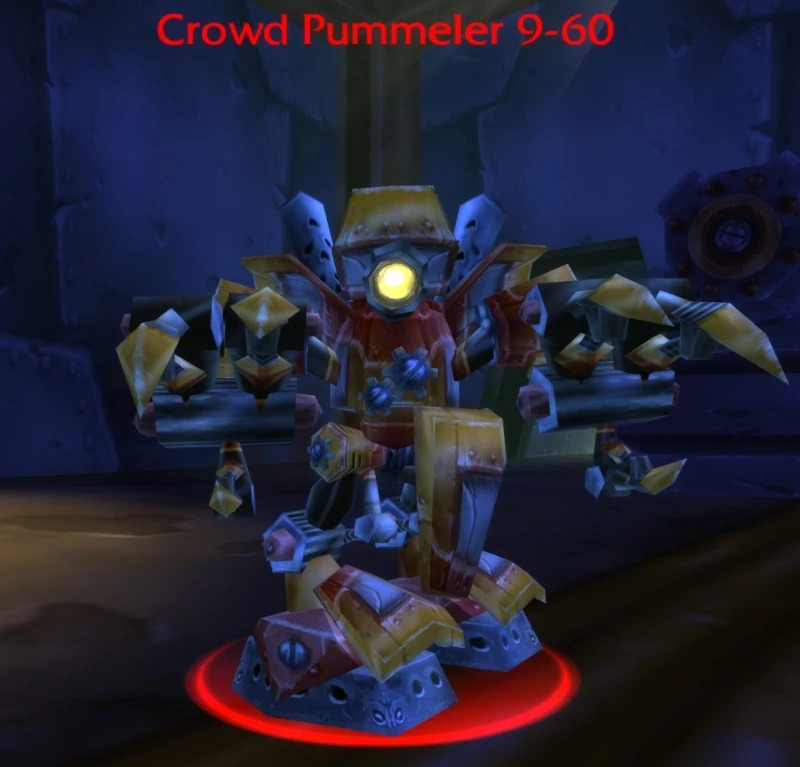
Advancing through the technological labyrinth of Gnomeregan, your team eventually converges before the chamber of Crowd Pummeler 9-60, the fourth boss and a mechanical behemoth known for its capacity to deliver disorienting blows and catastrophic body slams. This encounter requires a keen grasp of spatial awareness, as Crowd Pummeler’s abilities can scatter your group if not carefully managed. Here’s what you need to know to navigate this battle:
Tank Engagement: The tank needs to engage Crowd Pummeler 9-60 with resilience, anchoring the boss in place while mitigating the powerful blows which can knock back and disrupt the formation.
DPS Dynamics:
Strike from behind: DPS should position themselves behind the boss to avoid its frontal cone attack, ensuring maximum damage output without direct risk.
Coordinated crowd control: Be prepared to utilize any stuns or interrupts to counteract Crowd Pummeler’s potential ability robotics, hindering your team’s positioning and combat rhythm.
Healer Strategy: As the boss unleashes attacks capable of scattering allies, healers need to stay on their toes, providing swift triage and leveraging instant-cast heals to keep the team operational amidst spatial disarray.
The fight with Crowd Pummeler 9-60 is a test of tactical execution, requiring each team member to maneuver with precision to avoid the boss’s disruptive arsenal. For success, adhere to these points:
Watch for Special Mechanics: The boss periodically gears up for its namesake Pummeling assault, directing a series of rapid, successive strikes that necessitate rapid healing response.
Environmental Awareness: Be mindful of the surrounding hazards in the Engineering labs, where heaps of discarded machinery can conceal critical dangers or hamper movement during the fight.
Emerging victorious against Crowd Pummeler 9-60 will not only be a testament to physical prowess but to the nimble adaptability of your raid party to function as one cohesive unit amidst chaos. The spoils are well worth the effort, for defeating this mechanical monstrosity grants access to coveted loot designed to enhance your raid’s capabilities. Keep a tally of your wins and the rewards reaped, for Gnomeregan lays unsparing challenges ahead, and a true-hearted soldier’s greatest weapon against the unknown is the knowledge and power secured from past battles.
Boss 5: Dark Iron Ambassador
Navigating the perilous halls of Gnomeregan, the smoldering ember of conflict leads adventurers to an unexpected encounter with the Dark Iron Ambassador. This formidable rare spawn may conjure visions of grand diplomacy, yet for those who discover him skulking in the aftermath of Crowd Pummeler 9-60’s defeat, it’s clear his only negotiation tactic involves blistering combat. Despite being a lower-level dungeon boss, the Ambassador is no less deserving of tactical consideration, as his presence underscores the variety of Gnomeregan’s defenses. Key tactics to engage and defeat this rare emissary include:
Tanking Protocol: The Ambassador should be fronted by the tank, ensuring that he is held at a distance from the rest of the group to prevent the spreading of his fiery arsenal.
DPS Instructions: As part of a planned assault, damage dealers are to focus on swiftly eliminating any Burning Servants summoned by the Ambassador. Prioritize interrupting their Fireball casts, as these can inflict significant damage if left unchecked.
For healers, the strategy remains straightforward yet vigilant:
Healing Commandments: Remain at a safe distance whilst maintaining a stream of healing to the tank, who will be absorbing the brunt of the Ambassador’s ire. Additionally, be ready to dispense quick heals to party members who might suffer from random Fireball strikes from the summoned servants.
The loot dropped by the Dark Iron Ambassador, while not part of the mainstream loot table, holds its own enticements. Should adventurers vanquish this charred envoy of the Dark Iron clan, they stand a chance to claim:
The Emissary Cuffs, vanguards of magical defense suited for spellcasters.
The Glass Shooter, a formidable ranged weapon perfect for hunters and rogues.
The Royal Diplomatic Scepter, a ceremonial mace that can be brandished effectively by healers and Damage-Per-Second (DPS) casters alike.
The Ambassador’s adjusted levels over the years, from level 33 to 28, reflect the constant balancing act woven into the fabric of World of Warcraft, ensuring a fair but thrilling challenge across the game’s evolving landscape. His defeat may not alter the course of your journey as significantly as the main bosses, yet the experience and potential rewards he provides can often tip the scales in a tightly-contested raid progression. As you tread further into Gnomeregan’s heart, where Mekgineer Thermaplugg awaits, consider any meeting with the Dark Iron Ambassador as an unanticipated bonus—a trial by fire that hones your group’s might and resolve.
Boss 6: Mekgineer Thermaplugg
In the heart of Gnomeregan’s mechanical maze lies the final arbiter of your raid’s mettle, Mekgineer Thermaplugg—the self-styled autocrat reigning over the irradiated expanses with a tyrannical grip. His encounter is the culmination of strategy and strength, a battle that will crown your efforts with triumph should your tactics hold firm. Here is the crux of your confrontation with Thermaplugg:
A Rampant Onslaught of Bombs: Keep a vigilant eye as Thermaplugg, at health thresholds of 50% and 20%, increases the frequency of activating his bomb machines. These walking explosives pose a grave threat and must be dealt with posthaste.
Engagement and Aggro Management: Following the initiating “Knock Away” from Thermaplugg, the tank must rapidly reposition at the center to reclaim aggro and maintain the boss’s focus, ensuring the fight’s rhythm remains undisturbed.
As your group steel themselves for the final encounter, consider these pivotal approaches:
DPS Bomb Control:
Switch targets when bombs spawn, prioritizing their immediate disposal. A singular lapse here can cascade into chaos.
Pause bomb production by interacting with the consoles dotting the chamber’s perimeter—a crucial respite allowing your group to regain composure.
Healer Positioning:
Position yourself strategically away from the exploding contraptions, maintaining focus on sustaining the tank who stands against the might of Gnomeregan’s usurper.
Allocate healing resources effectively, considering the increased challenge infused into the fray by the insurgent bombs.
General Vigilance:
All party members should be ready to sidestep the “Steam Blast,” which Thermaplugg uses in a conal area in front of him, and the “Welding Beam,” focused on the player with the highest threat.
Keep mobile and responsive to the dynamic environment of the encounter, as the battle against Thermaplugg is an ever-escalating dance of destruction and precision.
Thermaplugg’s defeat, while assuredly grueling, is absent the convolutions that often characterize a final boss fight. Your entry strategy may simply be an all-out, coordinated assault. The critical piece is responding adeptly to his bombs and abilities. Once Mekgineer Thermaplugg is dismantled amidst the clamor of grinding gears and hissing steam, the echo of victory resounds through the vaulted halls of Gnomeregan. Triumphant, you will have undone the chaotic machinations of a corrupted mind, reclaiming a piece of the gnomish legacy that will be celebrated through tale and song alike, and amongst the prized plunder may just be the tools and treasures to write your own destiny.
Gnomeregan Raid Loot

Following the defeat of Gnomeregan’s final eccentric ruler, Mekgineer Thermaplugg, the spoils of victory become tangible in the forms of gear, armaments, and peculiar gadgets—the loot of Gnomeregan. Every adventurer yearns for the chance to unearth treasures, and this raid proffers a trove of items designed to bolster your arsenal and enhance your forays into Azeroth.
The Gnomeregan Raid Loot table is rich with items, some of which stand as unique symbols of the ingenuity and artifice that once flourished within these walls. Here are several standout rewards for those who conquer the mechanical chaos:
Cogblade Raiment: A robust suit of armor that melds gnome craftsmanship with warrior resilience.
Circuit Design Breastplate: Imbued with the essence of technological mastery, this piece is coveted by engineers and tinkerers.
Tempest Talisman: A necklace that crackles with the latent energy of the storms harnessed by gnome sorcery.
Electrocutioner Leg: An electrostatic weapon that allows wielders to channel powerful currents against their foes.
Thermaplugg’s Core: A trinket containing the raw innovative force of the Mekgineer himself, empowering its bearer with increased engineering prowess.
Additionally, adventurers may find an assortment of rings, trinkets, and gadgets dropped by the various bosses throughout the raid, each reflective of the gnomish spirit:
Grubbis Paws: Gloves that offer dexterity, suitable for rogues and hunters skulking through the shadows.
Viscous Hammer: A weapon swathed in toxic residue, offering a chance to poison enemies upon impact.
Electrician’s Leggings: Garb that resonates with the latent electric charges of Electrocutioner 6000, favored by spellcasters.
Manual Crowd Pummeler: A two-handed maul imbued with the destructive might of Crowd Pummeler 9-60, enhancing attack speed on command.
The Gnomeregan Raid Loot not only serves as a testament to feats of arms but also symbolizes the recovery of a legacy lost, each artifact a story of resilience amid the gears and steam of this gnome-built bastion. They are the engineers’ dream made manifest, the adventurers’ reward for braving the depths, and the resonating anthem of a people’s hope reclaimed amidst the twisted metal of Gnomeregan.
Gnomeregan World Buff
Amid the cogs and steam of Gnomeregan’s chaotic corridors, astute raiders may acquire the exceptional “Spark of Inspiration” World Buff, a newly discovered boon on the PTR for WoW Classic’s Season of Discovery Phase 2. This formidable enhancement, claimable within the confines of the Gnomeregan Raid dungeon, is the gnome’s gift to those brave enough to tackle the raid’s technological terrors, and it stands as a beacon of their enduring spirit.
As your party emerges victorious against the mechanical menaces, they might find themselves imbued with the following effects of the “Spark of Crazed Inspiration” buff:
A significant increase in the critical strike chance of spells by 4%,
The addition of 42 spell damage and healing, bolstering the potency of casters,
And a substantial 20% boost to melee and ranged attack, as well as movement speed, enhancing overall combat performance.
This unparalleled enhancement persists for a full 120 minutes, offering substantial support throughout the endurance-testing battles that dot the landscape of the Season of Discovery. The source of this invaluable buff is thought to emanate from a quest item dropped by Mekgineer Thermaplugg, providing a fitting end reward to an arduous journey.
Comparatively, while Blackfathom Deeps offers the “Boon of Blackfathom,” with its attack power and speed bonuses, and Ashenvale’s NPCs grant formidable buffs like Battlefield Inspiration and Battlefield Genius, it’s the “Spark of Inspiration” that perfectly encapsulates Gnomeregan’s essence. With the Darkmoon Faire continuing to serve as a significant source of World Buffs in the Season of Discovery, adventurers now have diverse means to augment their capabilities, each source reflecting the distinct cultures and environments of Azeroth.
Raiders vying for dominance within WoW Classic’s ingeniously engineered raid would do well to seek out the “Spark of Inspiration” as they prepare to overcome the nuances of Gnomeregan and lay claim to the treasures and triumphs that await within its storied halls.
FAQs
Venturing into the storied depths of Gnomeregan, seasoned raiders and newcomers alike may have a myriad of questions concerning this challenging 10-player instance. It’s with this in mind that we’ve compiled the most pertinent queries and their comprehensive answers:
Why choose Gnomeregan as a Raid?
While opinions vary, the inclusion of Gnomeregan as part of Season of Discovery’s raids adds refreshing diversity and taps into the nostalgic appeal for veterans harking back to the Classic era. It also provides an interesting storyline extension, as players experience revisited mechanics and arenas.
What level should my character be to join the raid?
Gnomeregan is targeted at players within the Phase 2 level band; your character should be at Level 40 to maximize your contributions to the raid team.
How often can I participate in the Gnomeregan raid?
Initially, the raid will operate on a weekly lockout during the first two weeks after SoD Phase 2’s launch. Thereafter, the lockout period switches to a 3-day cycle:
First Lockout: February 8th to February 13th
Second Lockout: February 13th to February 20th
Third Lockout: February 20th to February 23rd
Fourth Lockout: February 23rd to February 26th
Where is the raid entrance located?
For Alliance players, the lower section of Gnomeregan is accessible via an elevator from Dun Morogh. Horde players, after completing a questline with “Chief Engineer Scooty” at level 20, can utilize the Booty Bay teleporter to gain entry.
Are there any World Buffs I can get from Gnomeregan?
Yes, upon defeating Mekgineer Thermaplugg, adventurers can obtain “Spark of Inspiration,” which significantly bolsters critical-strike chance, spell damage and healing, as well as melee and ranged attack speed.
Will there be any new dungeons introduced for lower levels soon?
The community has clamored for dungeons catering to the 25-40 level band, with particular enthusiasm for the Scarlet Monastery. Although not officially confirmed, there’s ongoing speculation regarding potential future inclusions such as Stranglethorn Valley (STV) or Arathi Highlands areas in SoD.
Understanding these aspects of the Gnomeregan raid experience dispels any fog of uncertainty, allowing raid parties to forge ahead with clarity and purpose. Remain attuned for updates as the Season of Discovery unfolds, recognizing the ever-evolving landscape of World of Warcraft Classic and the new challenges it promises.
Conclusion
In conclusion, the intricate descent into the techno-puzzle that is Gnomeregan offers players an encounter filled with nostalgia, strategy, and the unmistakable charm of gnome ingenuity. Throughout this guide, we have navigated the winding paths and explosive encounters within its depths, providing a beacon for those who endeavor to reclaim this gnomish stronghold and unearth its secrets. The resilience and adaptability shown in each boss fight reflect not just on individual prowess, but on the team’s united front against the mechanical menaces that have corrupted a once-glorious city.
As we have seen, the true prize of Gnomeregan lies not solely in the formidable loot it wields — a bounty of gear and gadgets symbolizing the pinnacle of gnomish artifice — but also in the “Spark of Inspiration,” a World Buff that captures the essence of the raid itself. It’s a testament to the collective spirit of adventurers who rally together for a common cause, echoing the resilience of the gnomes whose brilliance continues to shine amidst adversity.
In embarking on the Gnomeregan raid, players not only face a gauntlet of unique challenges but also carry forward the torch of exploration into the heart of Azeroth’s history. The broader implications of these encounters — the strategies devised, the community formed, and the memories forged — enrich the tapestry of World of Warcraft’s enduring legacy.
As we leave the steam-filled corridors and echo with the clanging gears of triumph, let us carry aboard the newly gained knowledge to face future trials, while always remembering this maxim: The greatest loot is the experience shared and the lessons learned that together, any challenge can be conquered.
For the unrelenting adventurers and crafty tacticians who seek to delve deeper or broaden their horizon, Gnomeregan stands as a proud reminder of the dynamism within WoW Classic. It signifies the potential for growth and resurgence, as we collectively await further revelations, dungeons, and adventures that await in the enigmatic realm of Azeroth.
May this guide serve as a lasting resource for those who journey into the depths, and may your adventures be as rewarding as the treasures that lie hidden in the heart of the Gnomeregan raid.
Related Guides
Rainbow Six Siege Calypso Casino Guide: Best Strategies, Operators & Site Setups

Black Ops 7 Illicit Cargo Event Rewards Guide: Every Camo, Challenge & Unlock Explained
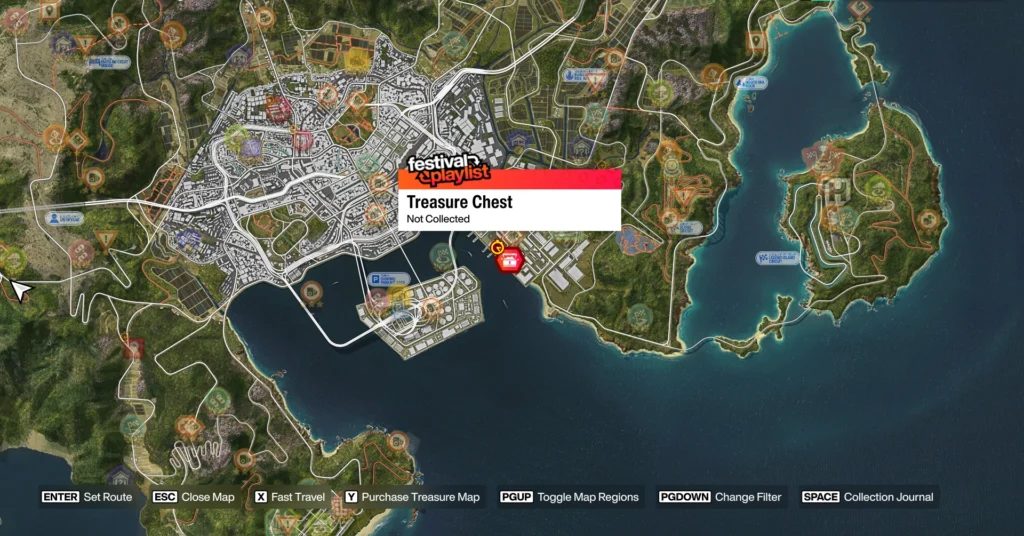
Forza Horizon 6 Treasure Hunt in Tokyo City Location (Spring) – Complete Guide
Forza Horizon 6 AstroToy Photo Challenge Guide: HZN-VI Rocket Location Explained